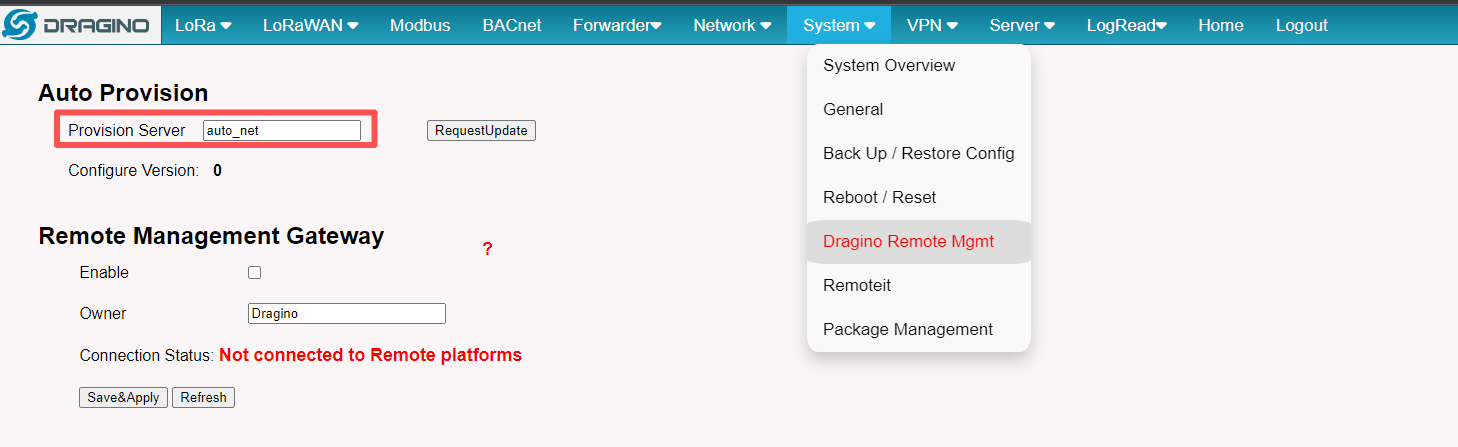
Auto Provision
1. Introduction
Since firmware lgw-5.4.1609393379 (build Thu Dec 31 13:42:59 CST 2020) , the dragino gateway support Auto-Provision feature.
Auto-Provision feature is used to batch config gateways. It can be used for below cases:
- Upload configure files to new gateway, without access to the gateway.
- Execute scripts on gateway, without access to the gateway.
- Auto change configure or execute commands on gateways remotely.
The document for the Auto-Provisioning is here: http://www.dragino.com/downloads/index.php?dir=LoRa_Gateway/LG308-LG301/Firmware/Application_Note/&file=Auto-update-feature.pdf
And Video Instruction is here: https://www.youtube.com/watch?v=kDC2eRUkDss
2. Auto-Provisioning Workflow
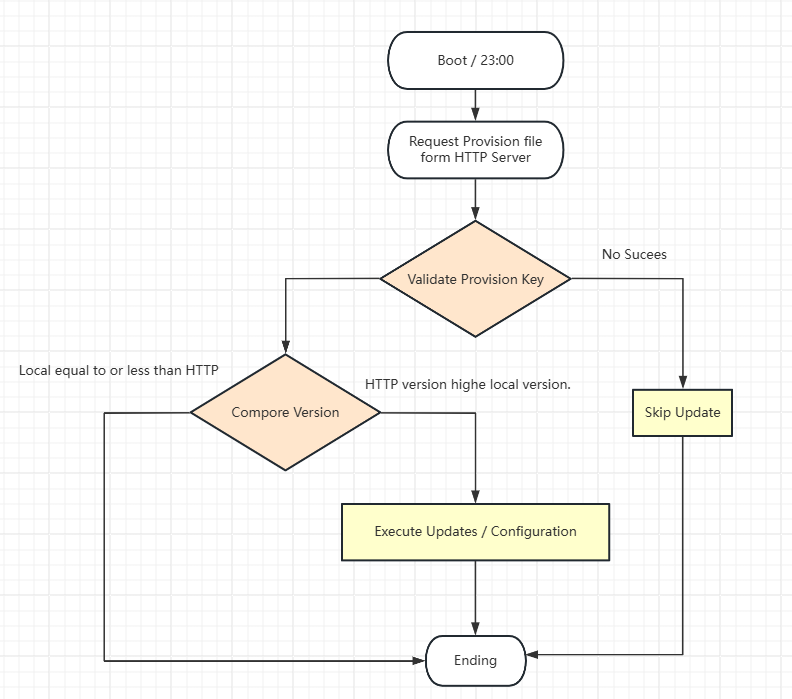
1. Gateway triggers auto-provisioning
-
At every boot
-
Daily at 23:00 2. Fetch the provision file
-
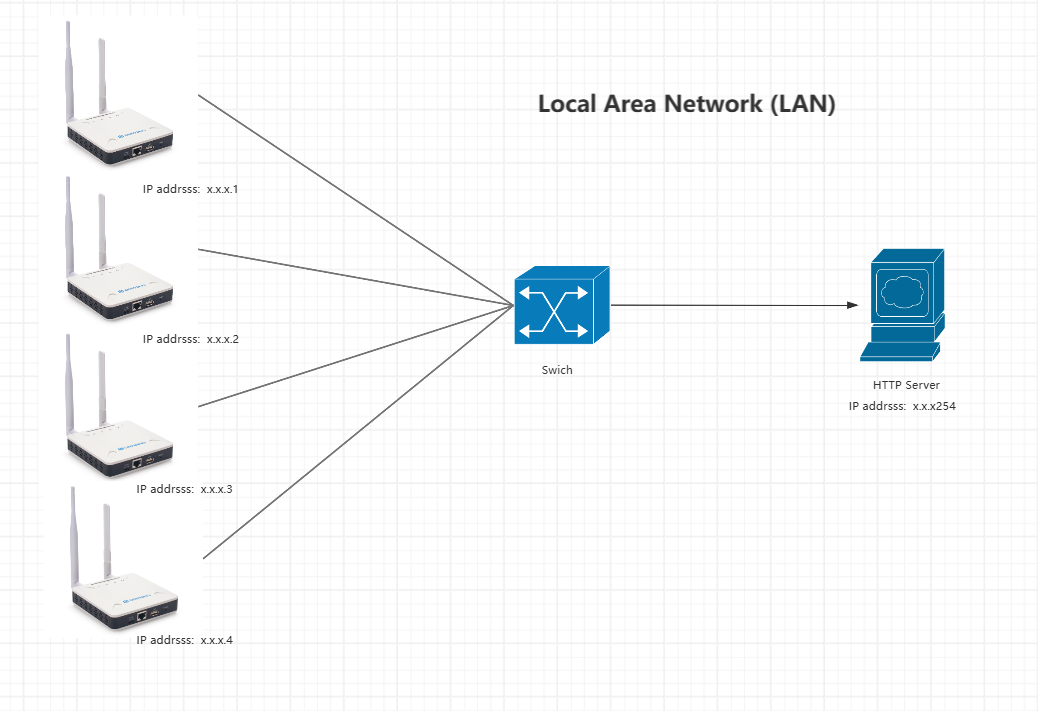
Gateway sends a request to the HTTP server (default: x.x.x.254)
-
Server returns a provision file containing:
- Version number
- Provision key (unique per gateway)
- Configuration and update content 3. Validate provision key
-
Gateway checks if the provision key matches its own.
-
❌ If the key does not match, → update is skipped
-
✅ If the key matches → proceed to version check
4. Compare versions
- Gateway compares the version in the provision file with its current version.
- ❌ If version is older or equal → no update
- ✅ If version is newer → proceed to apply update
5. Apply configuration/update
- Gateway automatically applies the configuration and updates the content from the provision file
6. Optional: Change server
- Default HTTP server is x.x.x.254 (local network)
- To use a different server or external address, modify it in the gateway configuration page
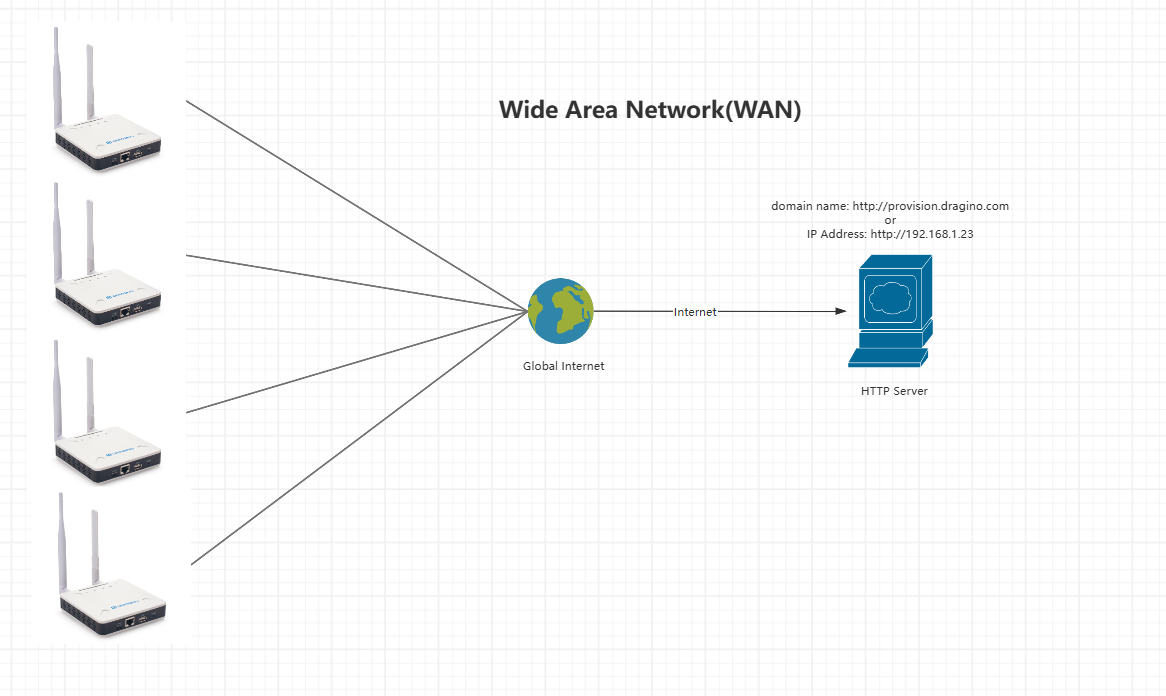
How to set the external address:
We also provide an Auto-Provision Box, which can be placed in your local network and do the auto-provision locally. Please contact your contact in Dragino for more details about this.
3. How to Use the Auto-Provision Box
1. Set the Box IP address to x.x.x.254
-
Access the Box Access Apoint
---> SSID: dragino-xxxx Password: dragino+dragino -
Access the Web UI
---> [http://10.130.1.1](http://10.130.1.1) -
If you're using the WiFi network
----> [http://10.130.1.1/cgi-bin/system-wifi.has](http://10.130.1.1/cgi-bin/system-wifi.has)
-
If you're using the Ethernet network
--> http://10.130.1.1/cgi-bin/system-network.has
2. Access the auto-provision home page:
---> http://10.130.1.1/cgi-bin/system-network.has
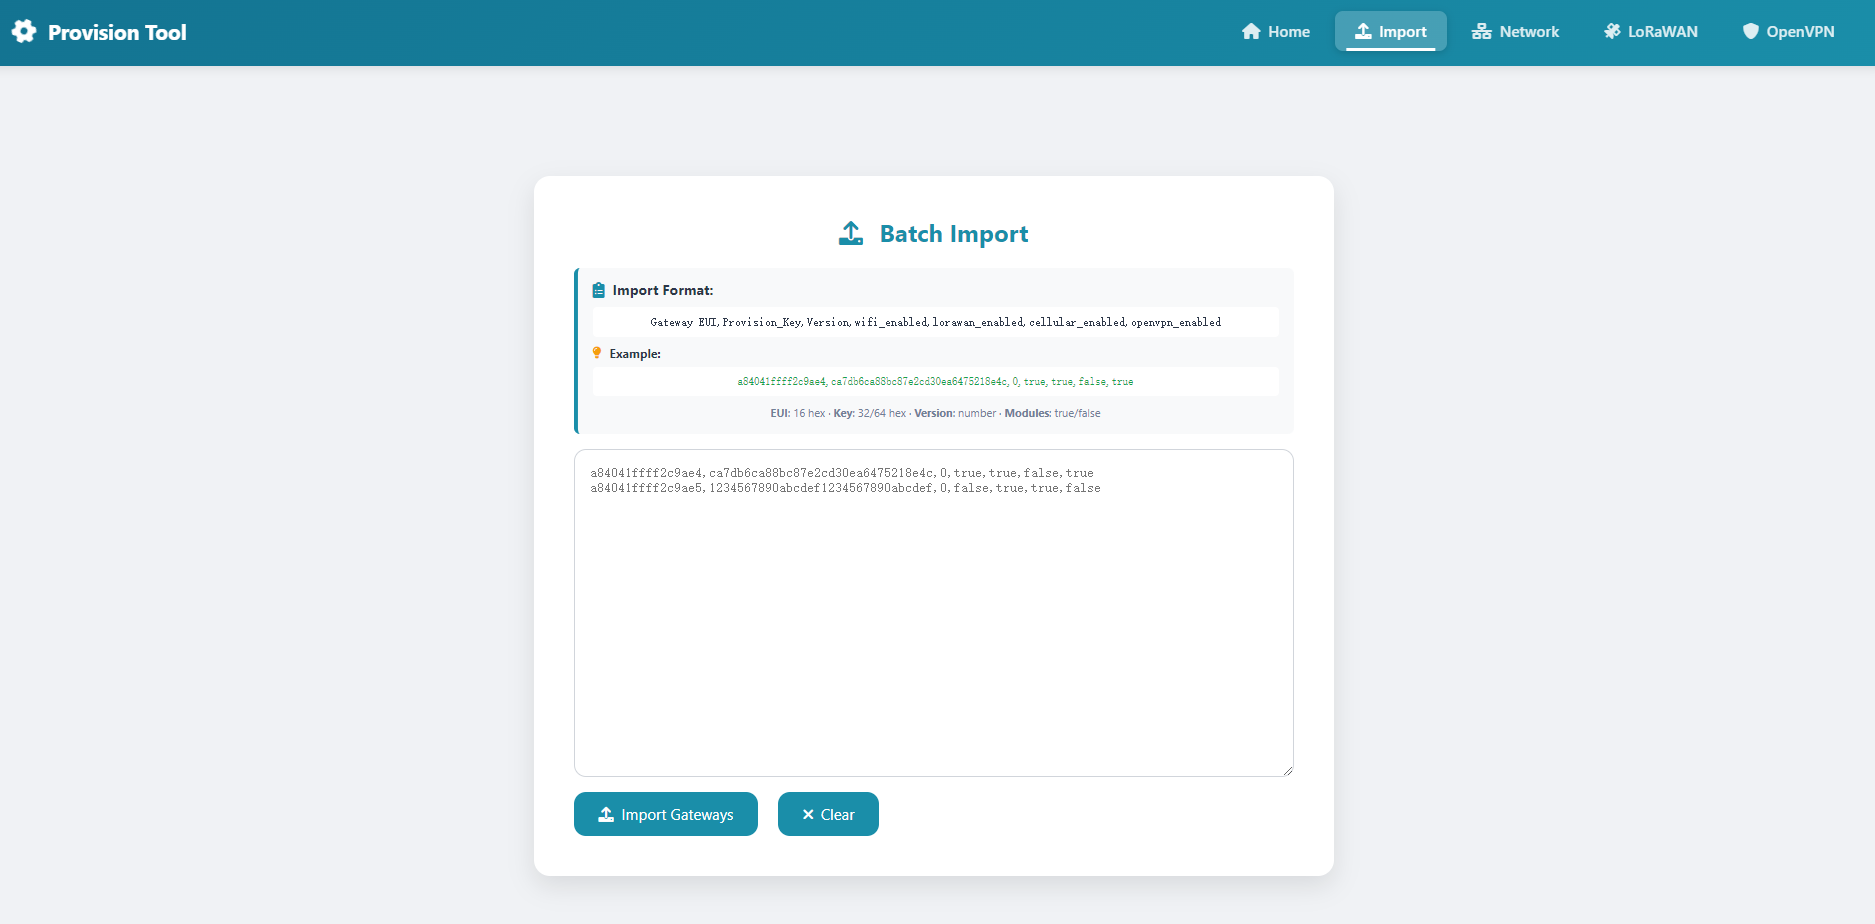
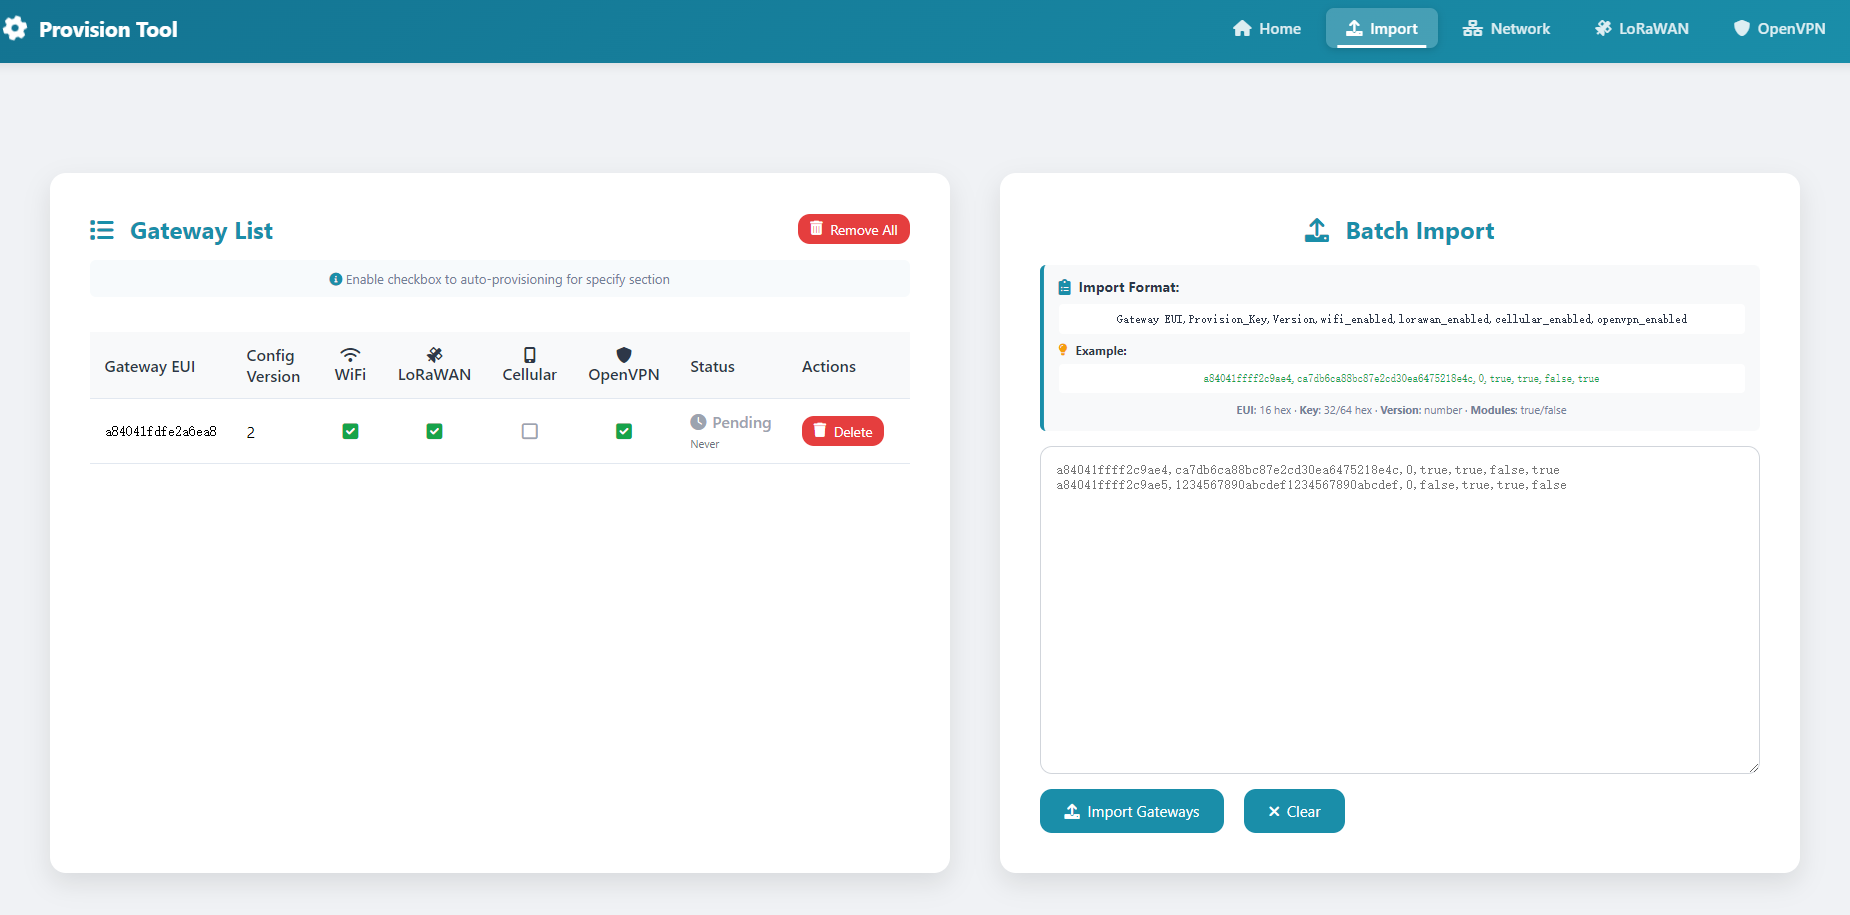
3. Import Gateway Configuration
Each gateway has a unique GWEUI and provisioning key.
You need to import the gateway’s GWEUI and provisioning key into the tool, which will then generate a configuration file.
This file allows the gateway to authenticate with the provision tool.
The import format is: GatewayEUI,Provision_Key,Version,WiFi_enabled,LoRaWAN_enabled,Cellular_enabled
Gateway_EUI:
Gateway EUI
Provision_Key
Gateway Provision Key
Version
Auto-provision version, ensuring the gateway applies only once
WiFi_Enabled
Enable the tool's WiFi configuration
LoRaWAN_Enabled
Enable the tool's LoRaWAN configuration
Cellular_Enabled
Enable the tool's Cellular configuration
OpenVPN_Enabled
Enable the tool's OpenVPN configuration
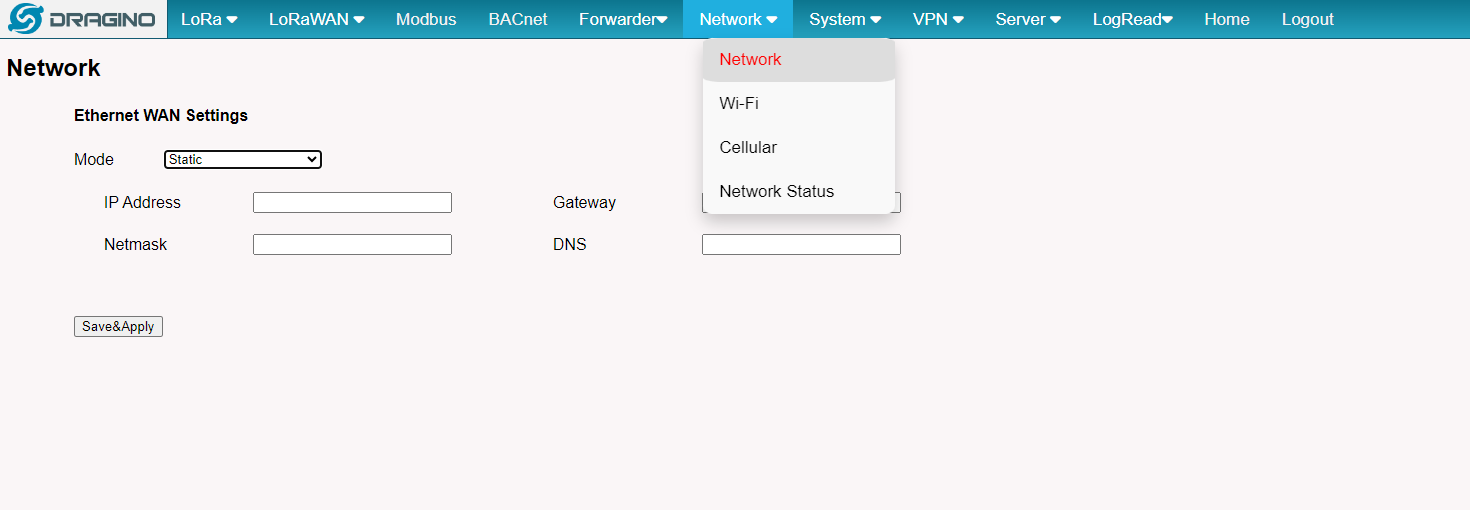
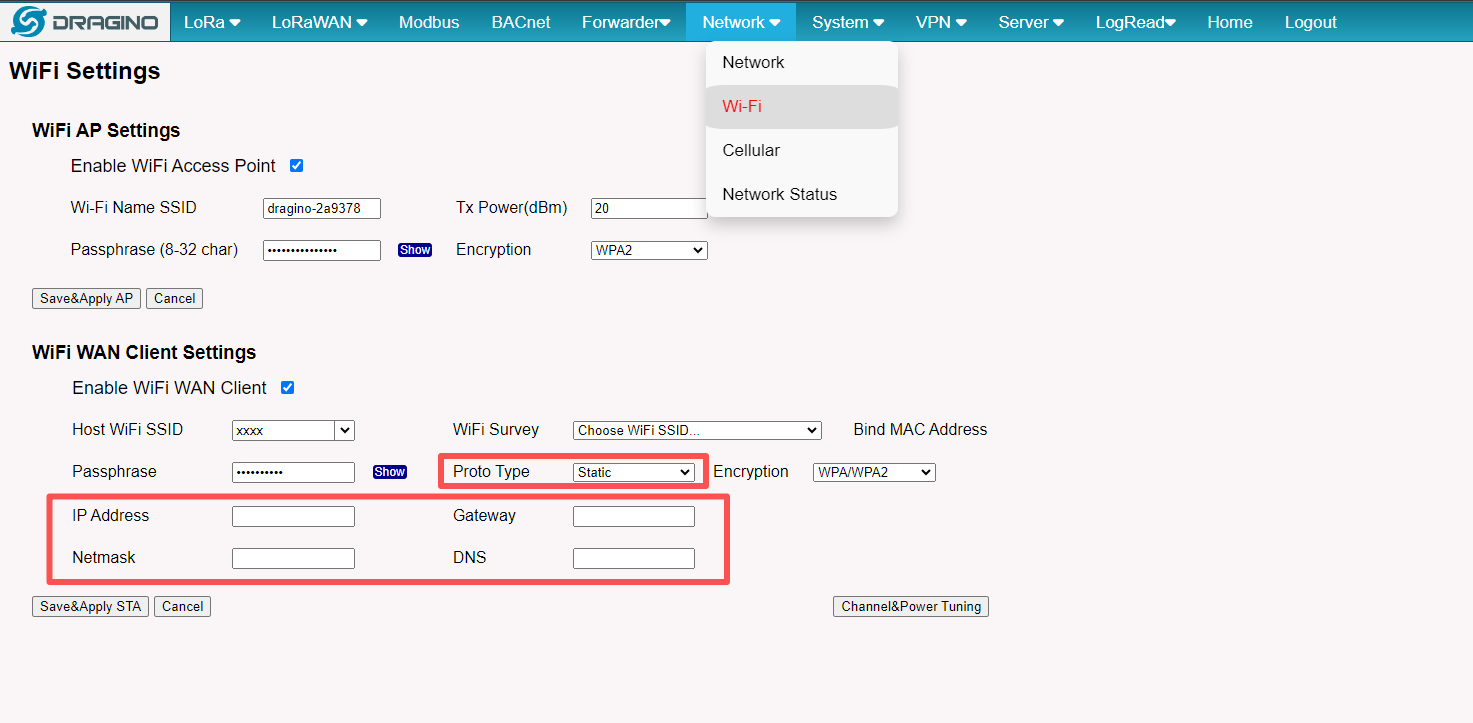
4. Configure network settings

5. LoRaWAN Configuration
1). Semtech UDP mode
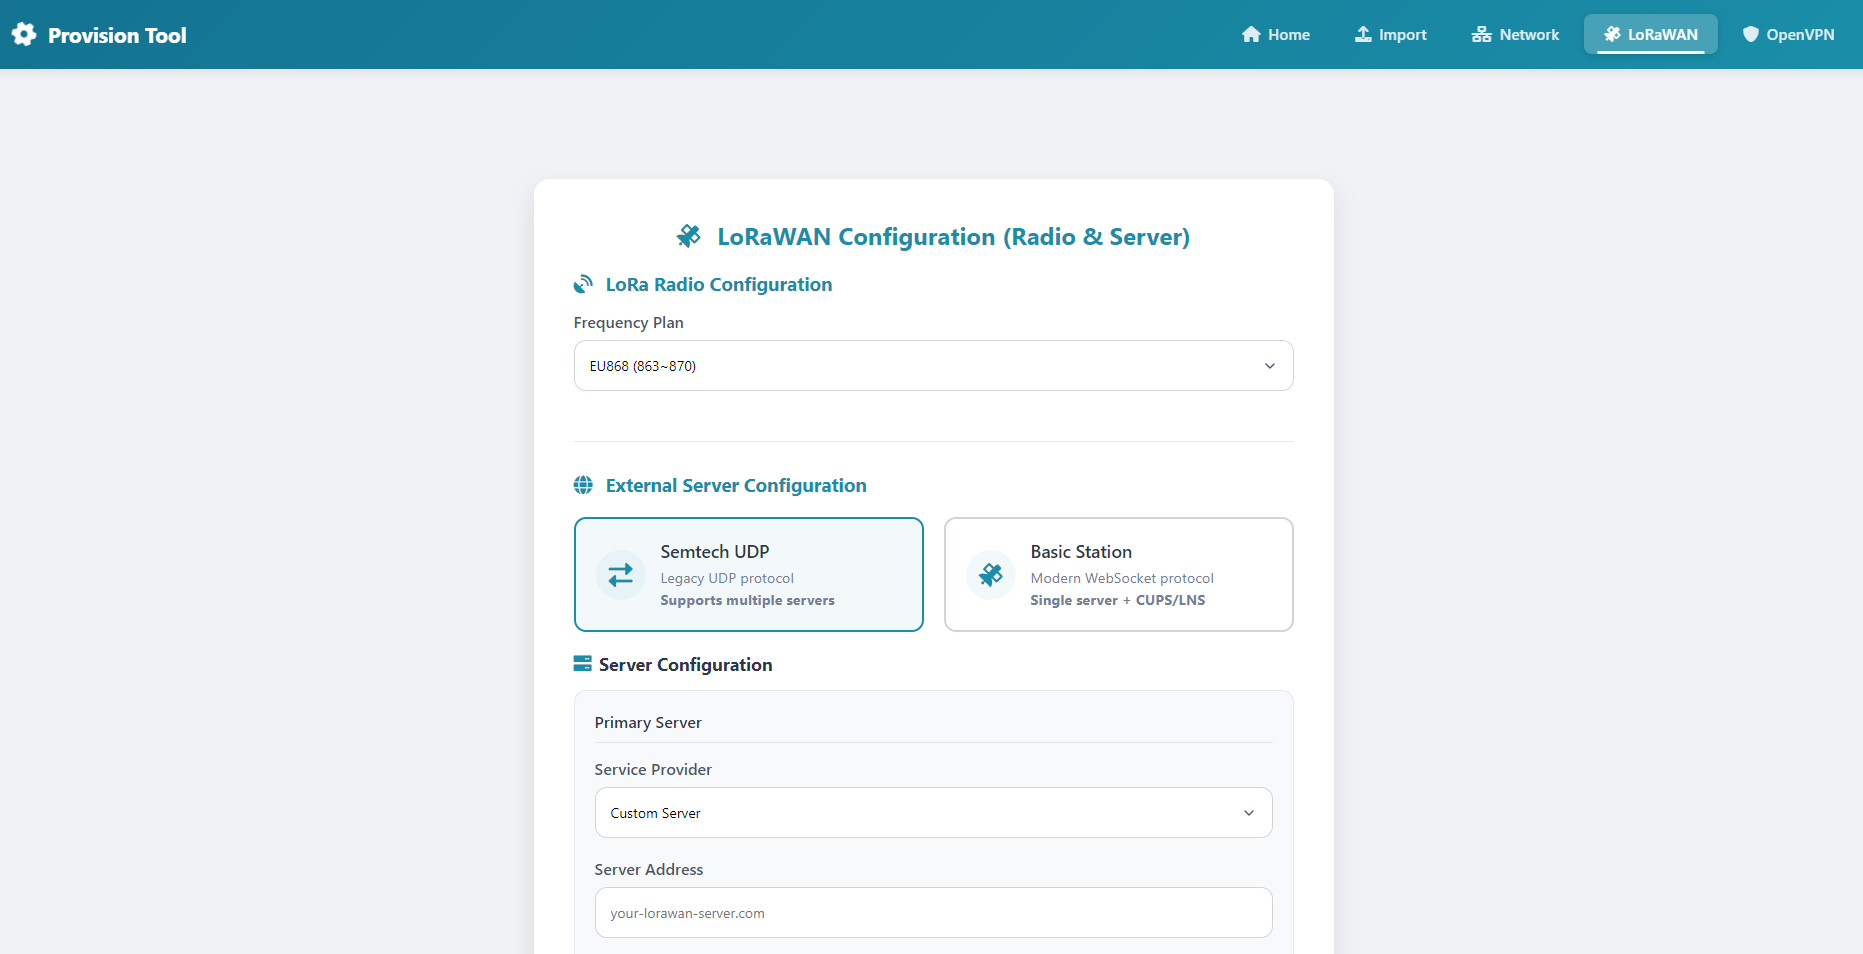
2) Basic Station mode
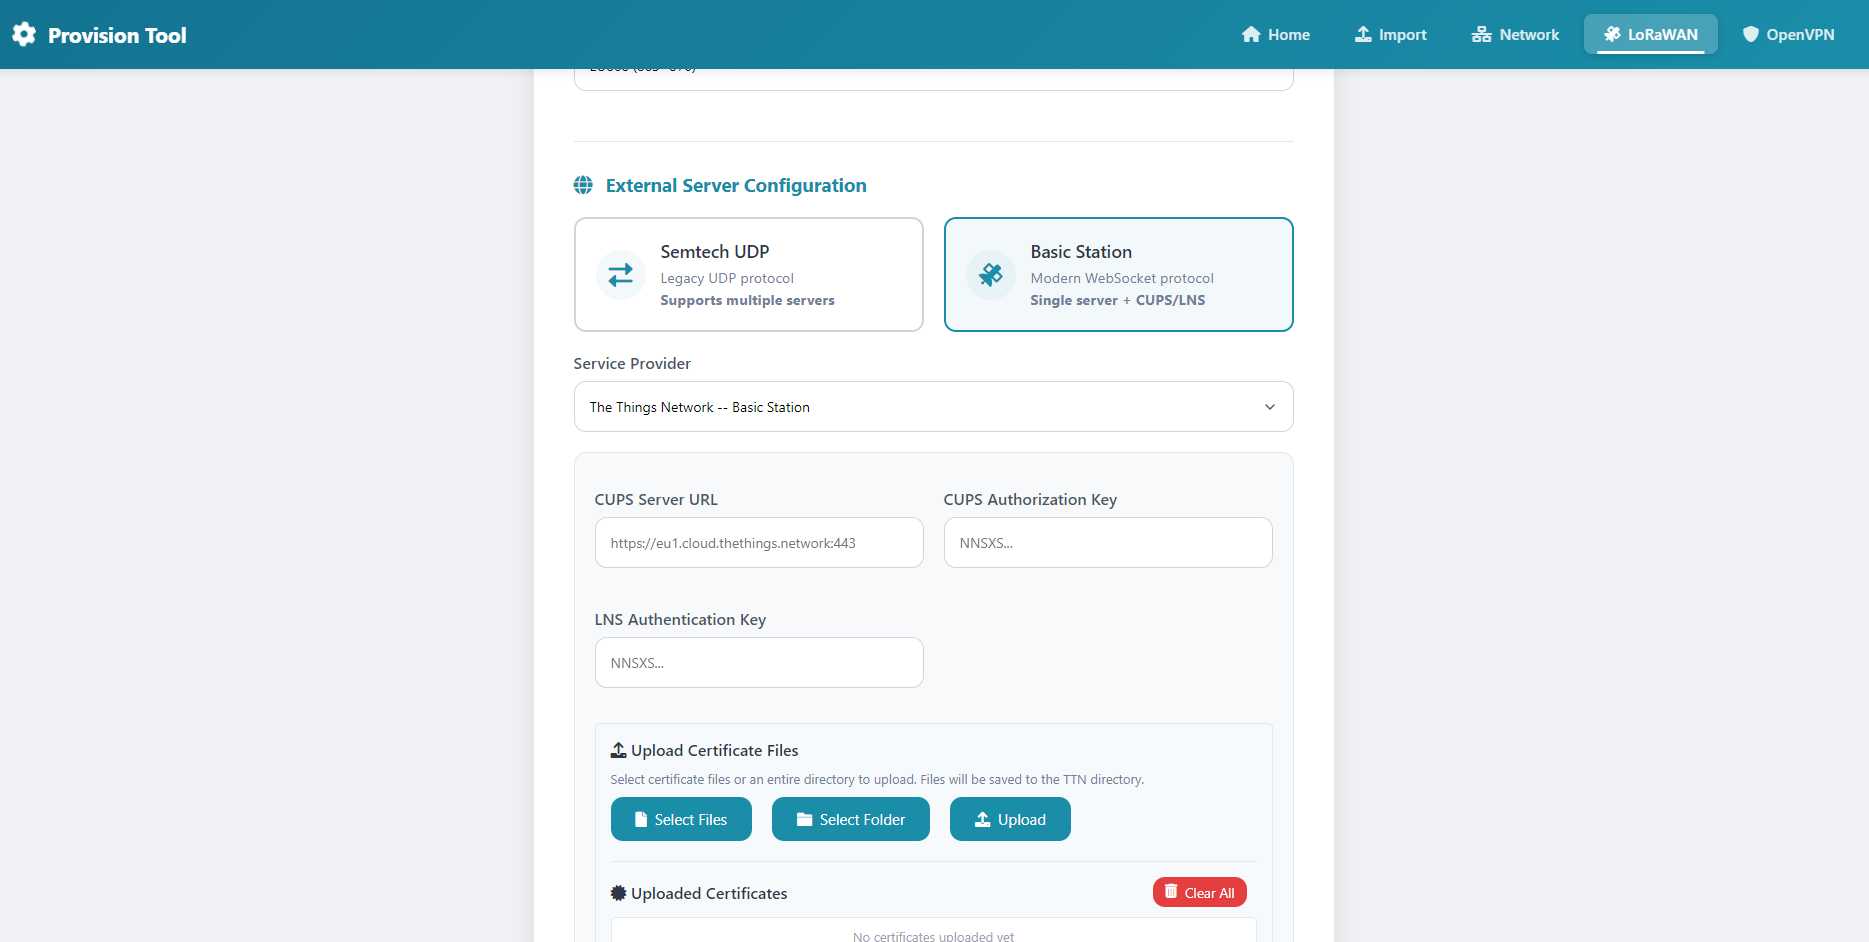
Due to the uniqueness of AWS private keys, please follow the rules below when uploading certificates:
- The private key certificate for each gateway should be named according to the gateway's GWEUI.
- CUPS and LNS certificates do not require renaming; simply upload them as-is.
For example:
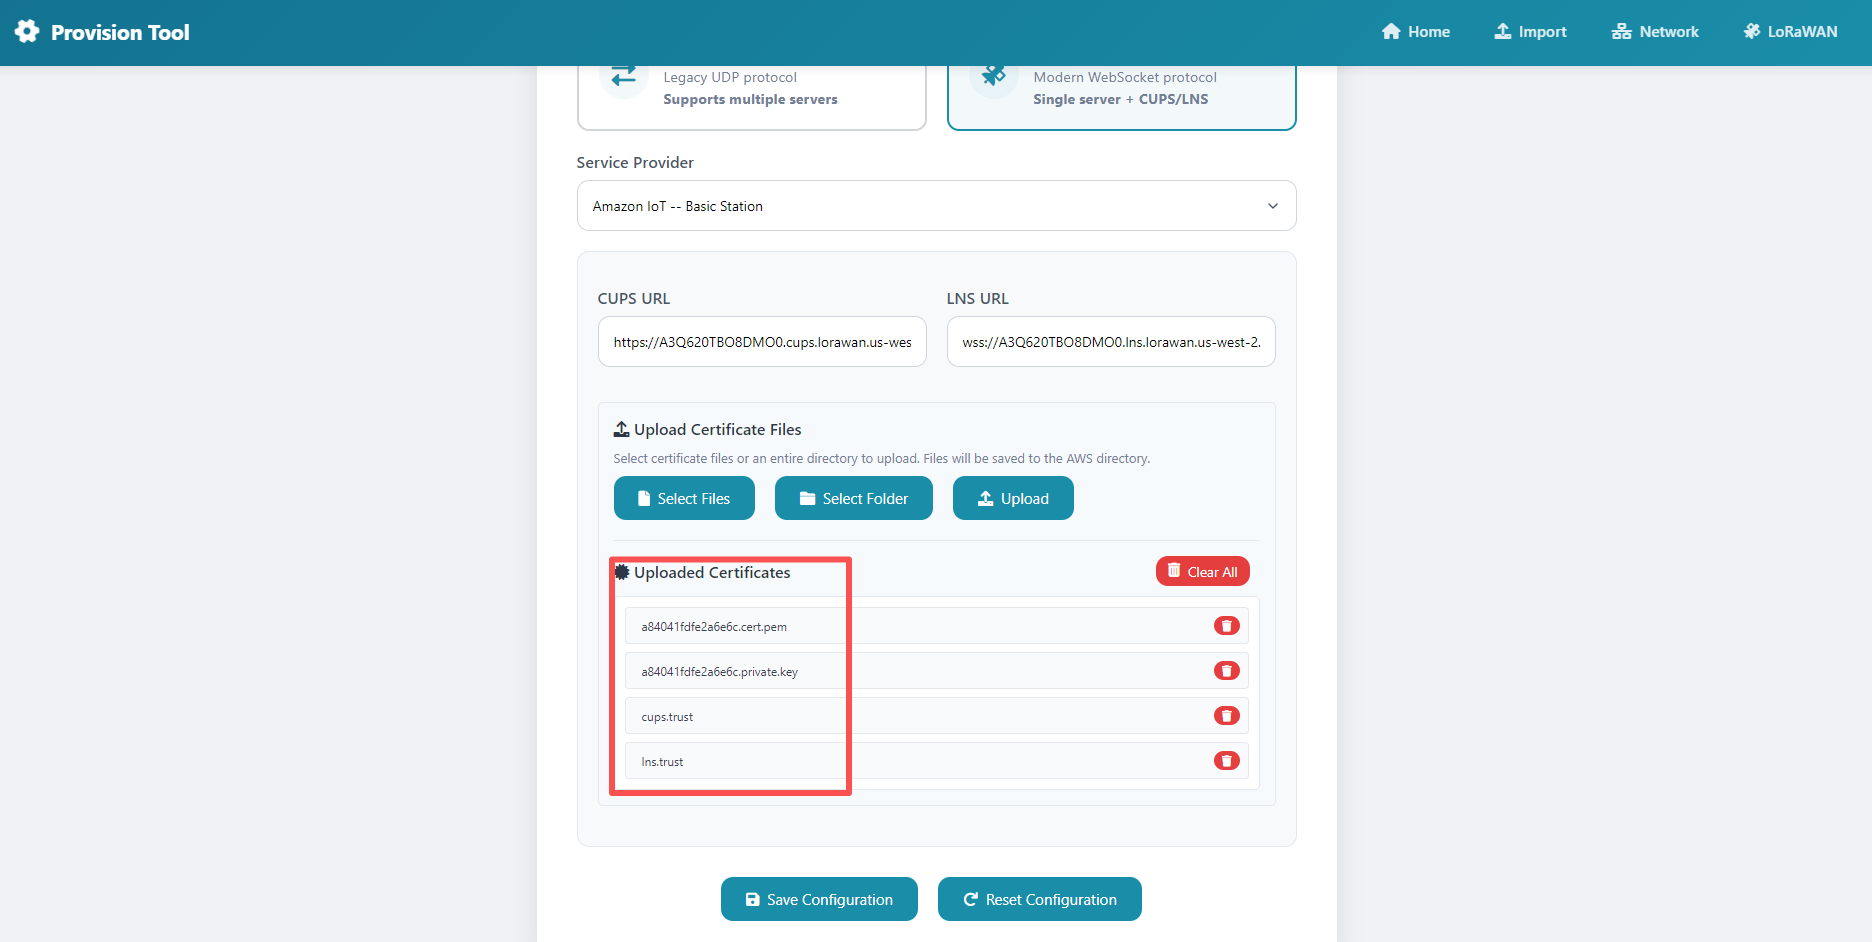
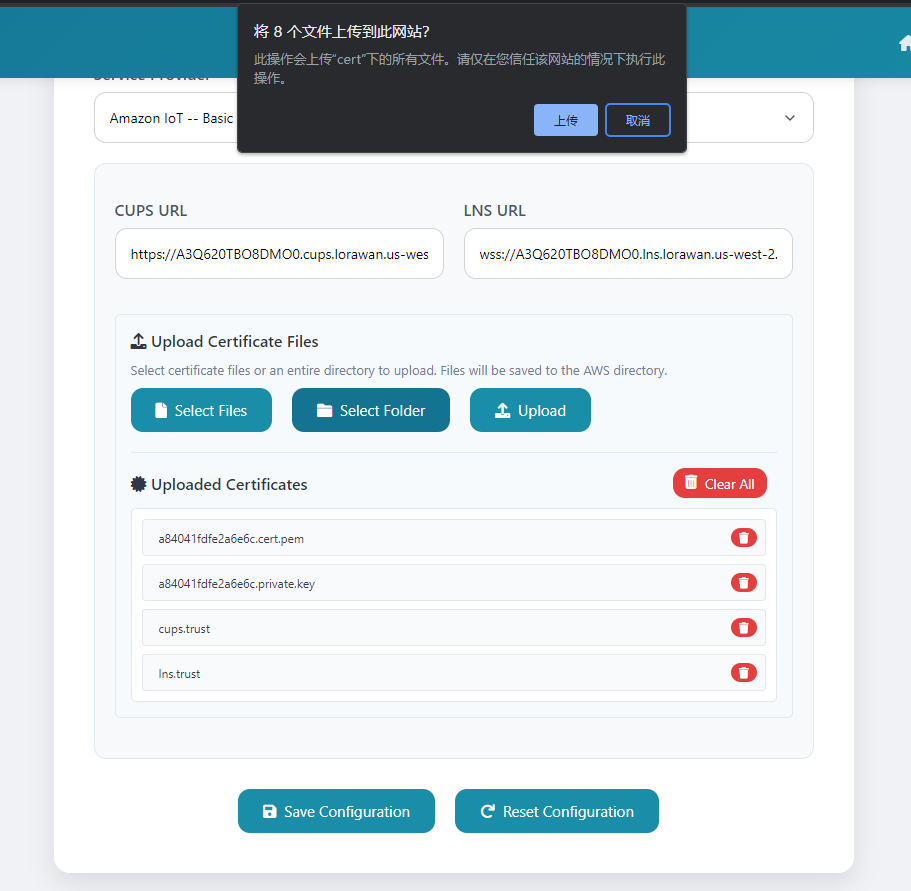
How to Upload Certificates in Bulk
1. Prepare a directory
2. Place the certificates in the directory

3. Select “Select Directory” and choose the prepared directory
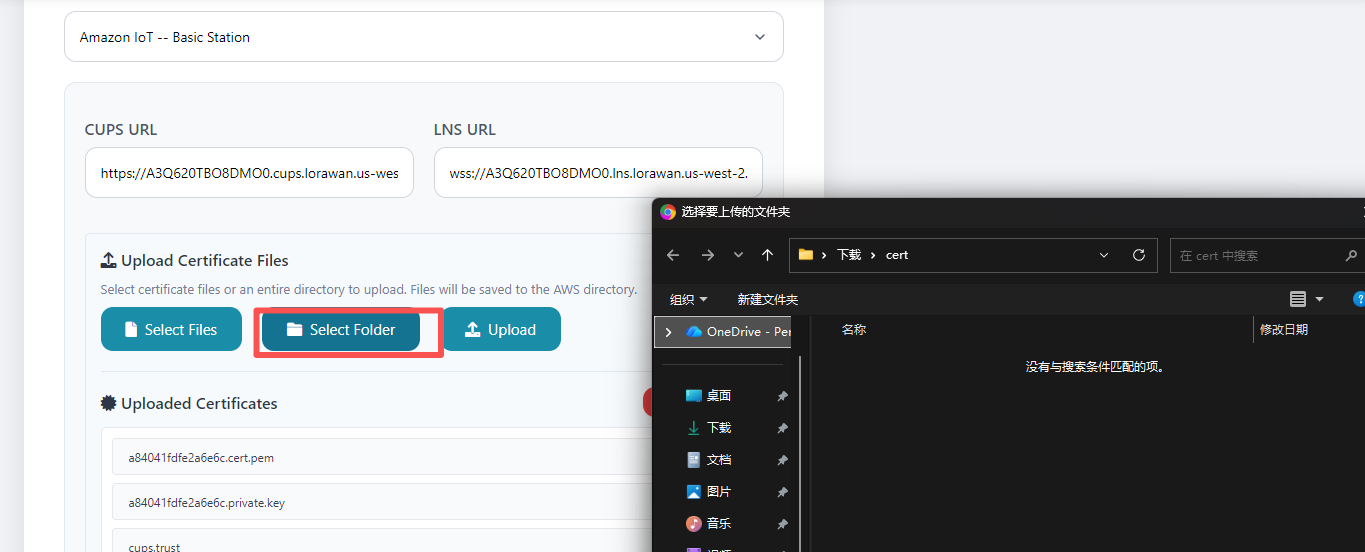
4. The page will display the total number of files being uploaded to the box
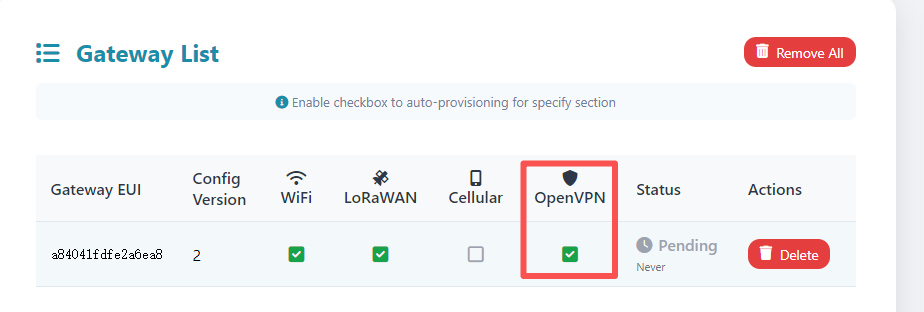
6. OpenVPN Configuration
6.1. Upload configuration file
Once OpenVPN is enabled, the gateway will download an OpenVPN configuration file from the box. The file will be named using the gateway's own **GWEUI** (for example: a84041fdfe2a6ea8.conf).
a) Enable OpenVPN in the provision settings
When you import gateway settings, make sure the option for OpenVPN is enabled. This tells the gateway to request an OpenVPN configuration.
b) Create the .conf file with embedded certificate
Create the OpenVPN .conf file and embed the required certificate/key directly inside the file (inline). The gateway expects a single .conf that contains both the configuration and the certificate material.
![]()
c) Upload the configuration
Go to the device's OpenVPN page in the box's web UI and click Upload. Select the .conf file you created (the one named after the gateway's GWEUI) and upload it.
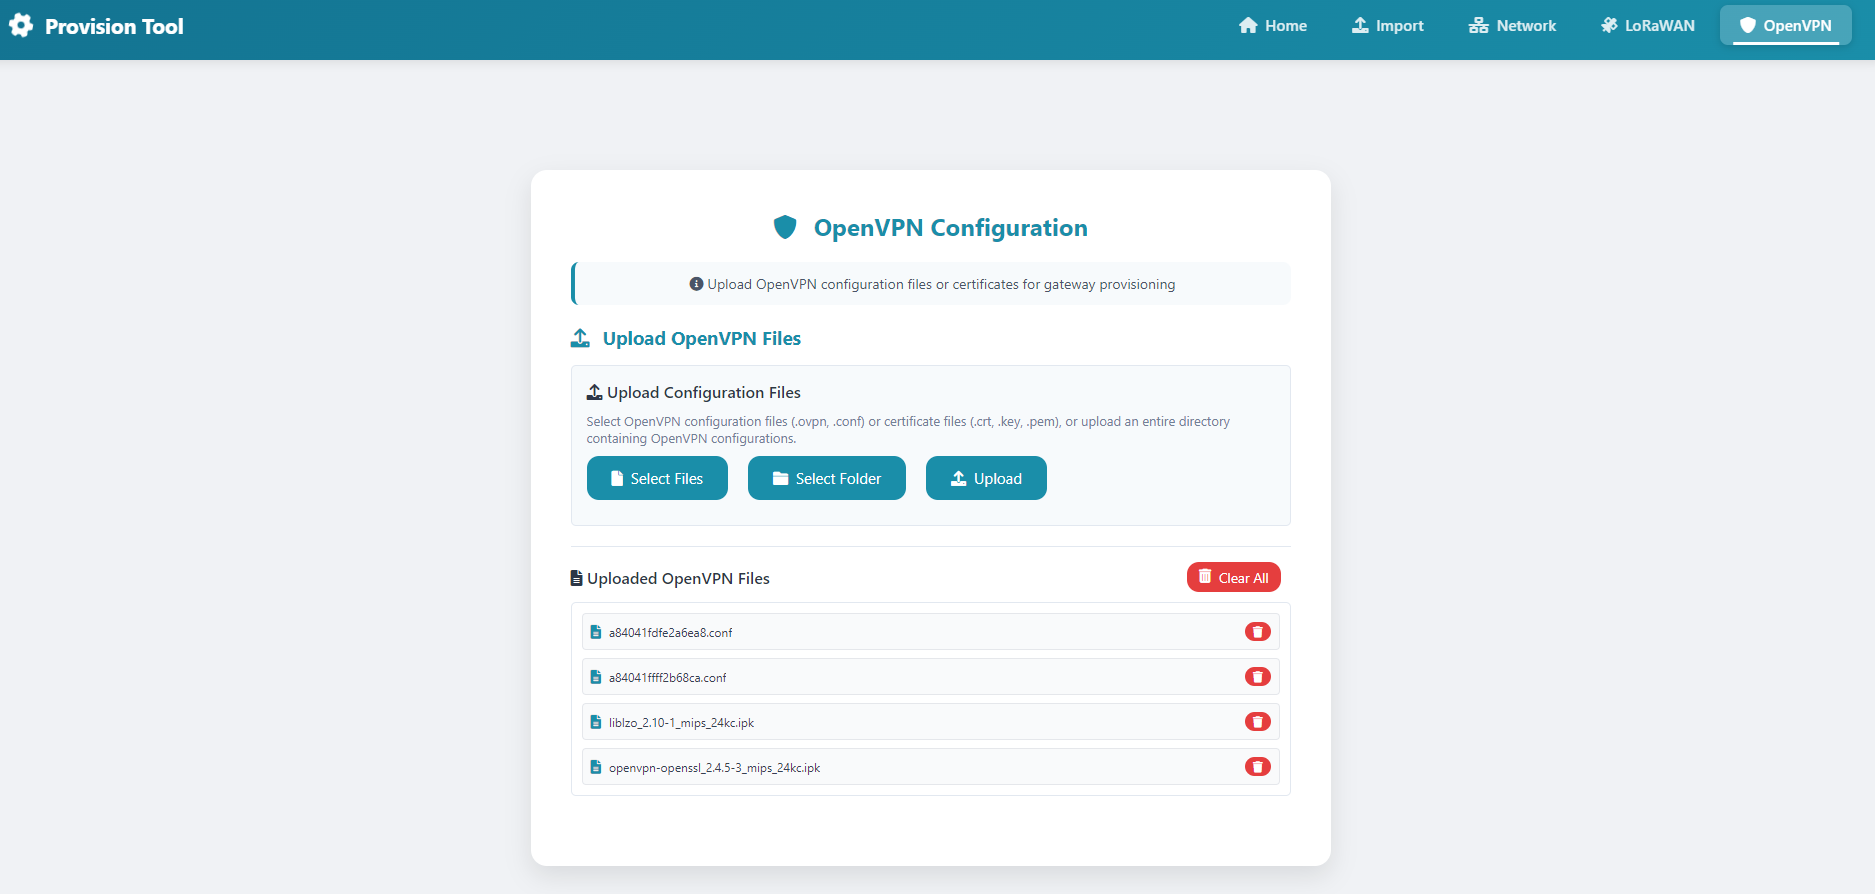
Note: liblzo_2.10-1_mips_24kc.ipk and openvpn-openssl_2.4.5-3_mips_24kc.ipk are for use with LPS8N/DLOS8N; do not delete them.
0
Toggle the left panel column.