LORIOT
1. Introduction
The Dragino LoRaWAN gateway can communicate with LORIOT LoRaWAN Network Server:
Below list the products and requirements that support communication with LORIOT using Semtech UDP:
- LoRaWAN Gateway model: DLOS8N, LPS8N, LG308N
- Firmware version since : lgw--build-v5.4.1661158991-20220822-1704
2. Gateway Registration for Semtech UDP
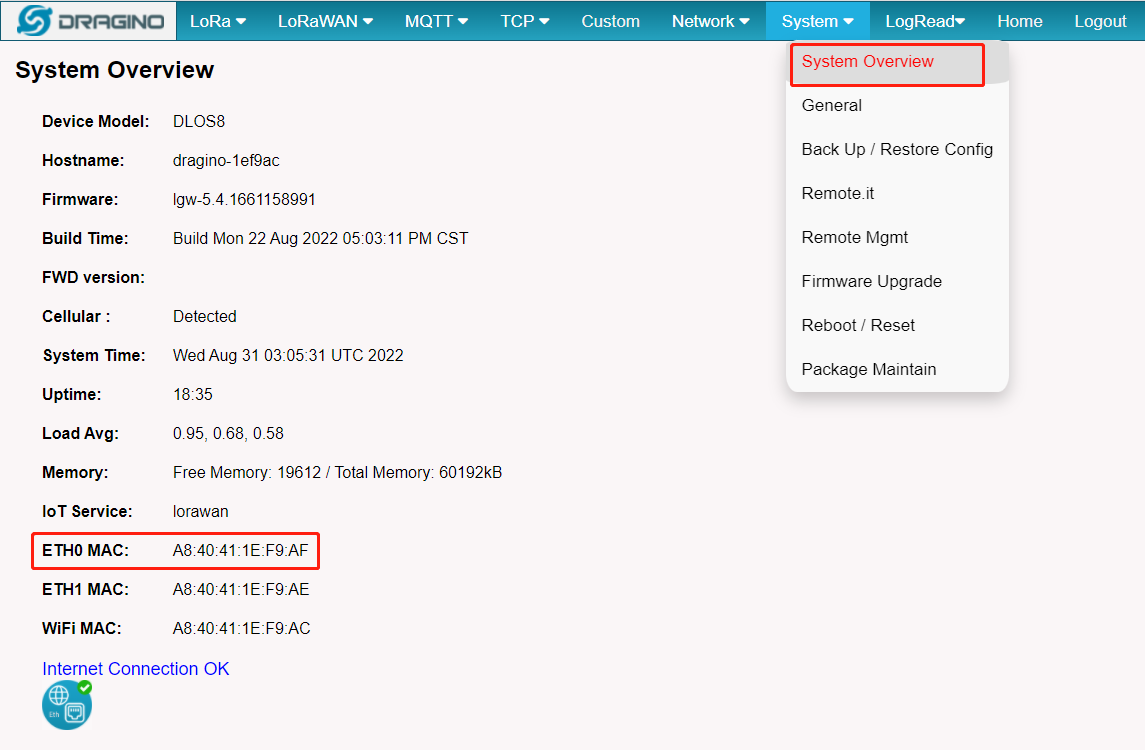
2.1 Step 1: Get Gateway ETH0 MAC Address
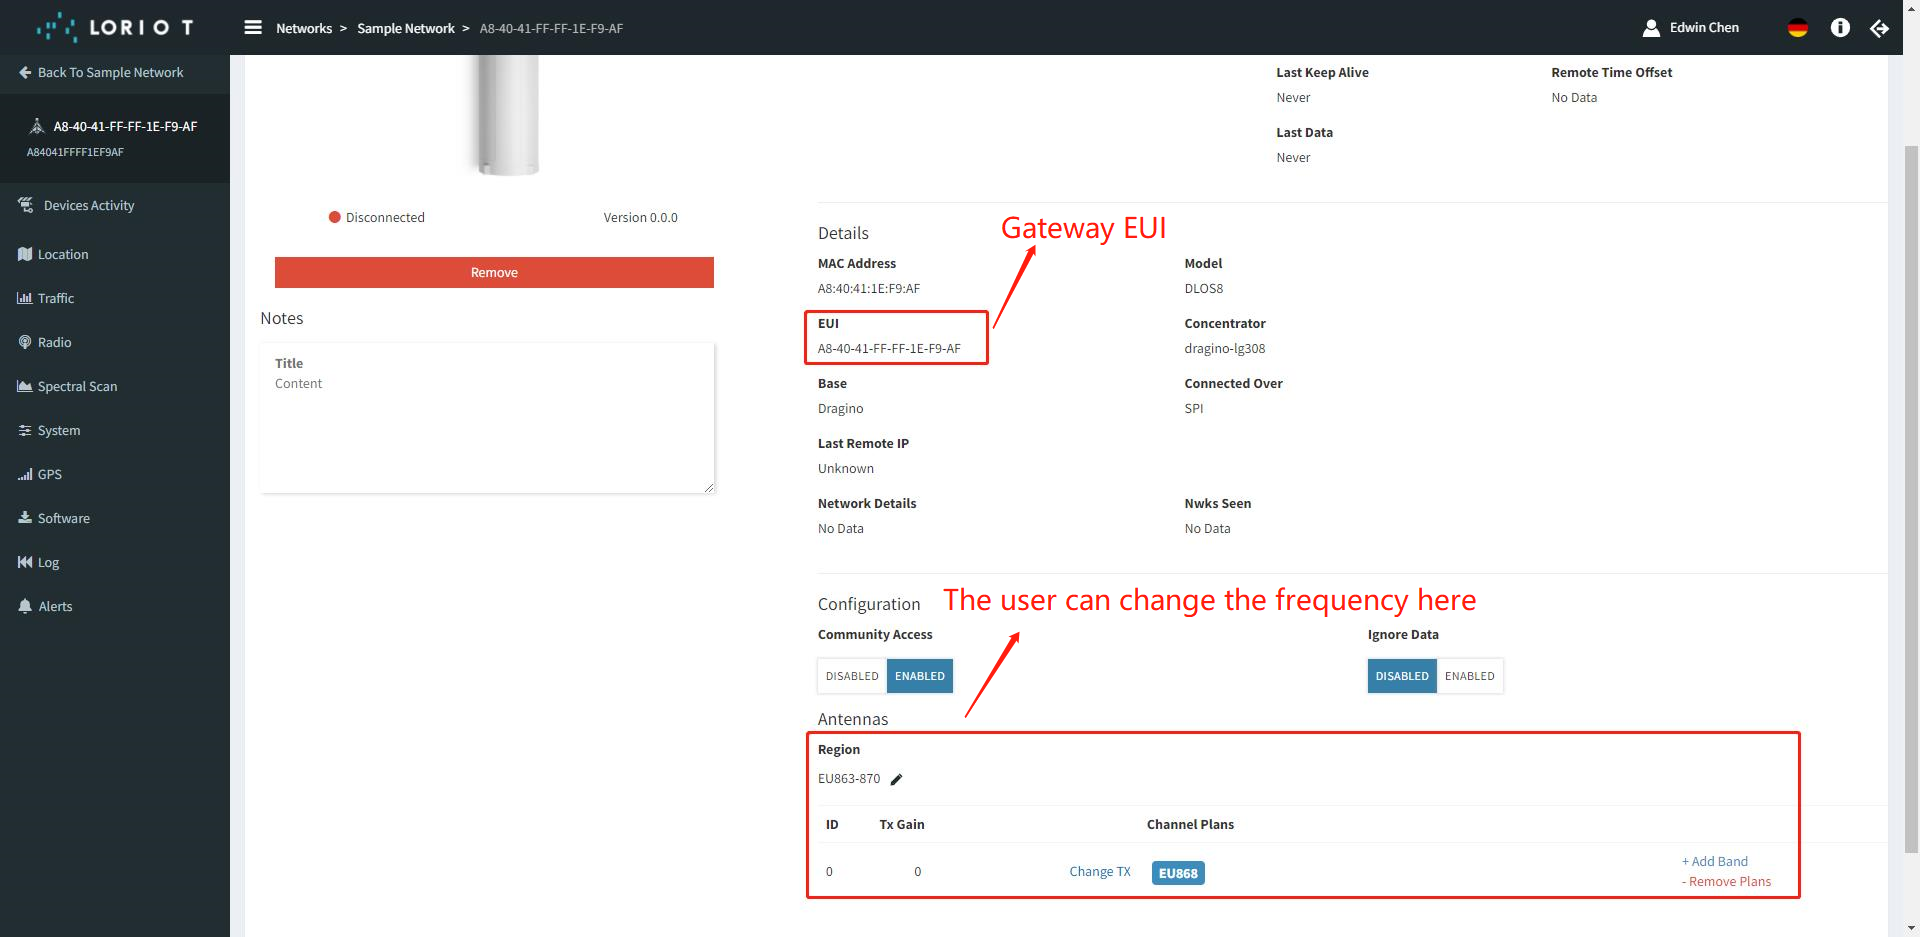
Dragino LoRaWAN gateway uses ETH0 MAC address to generate Gateway EUI to communicate with LORIOT, The user needs to find the ETH0 MAC in the "System -> System Overview" menu.
2.2 Step 2: Register Gateway
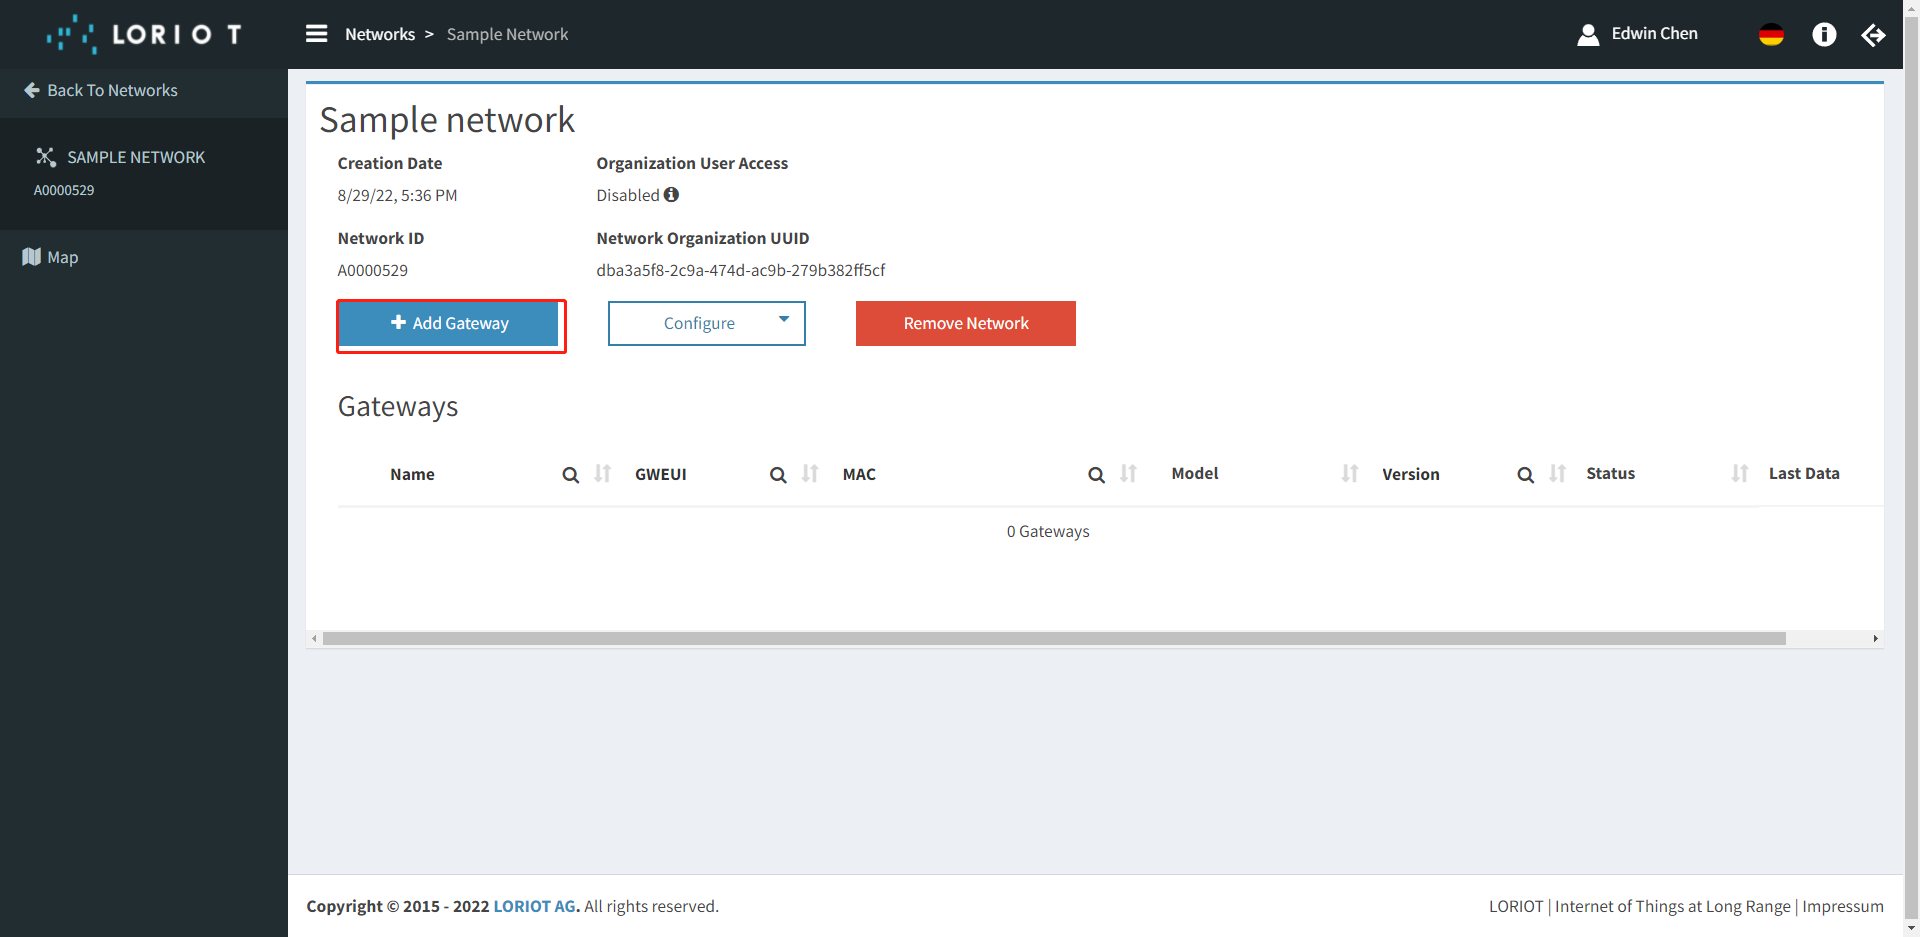
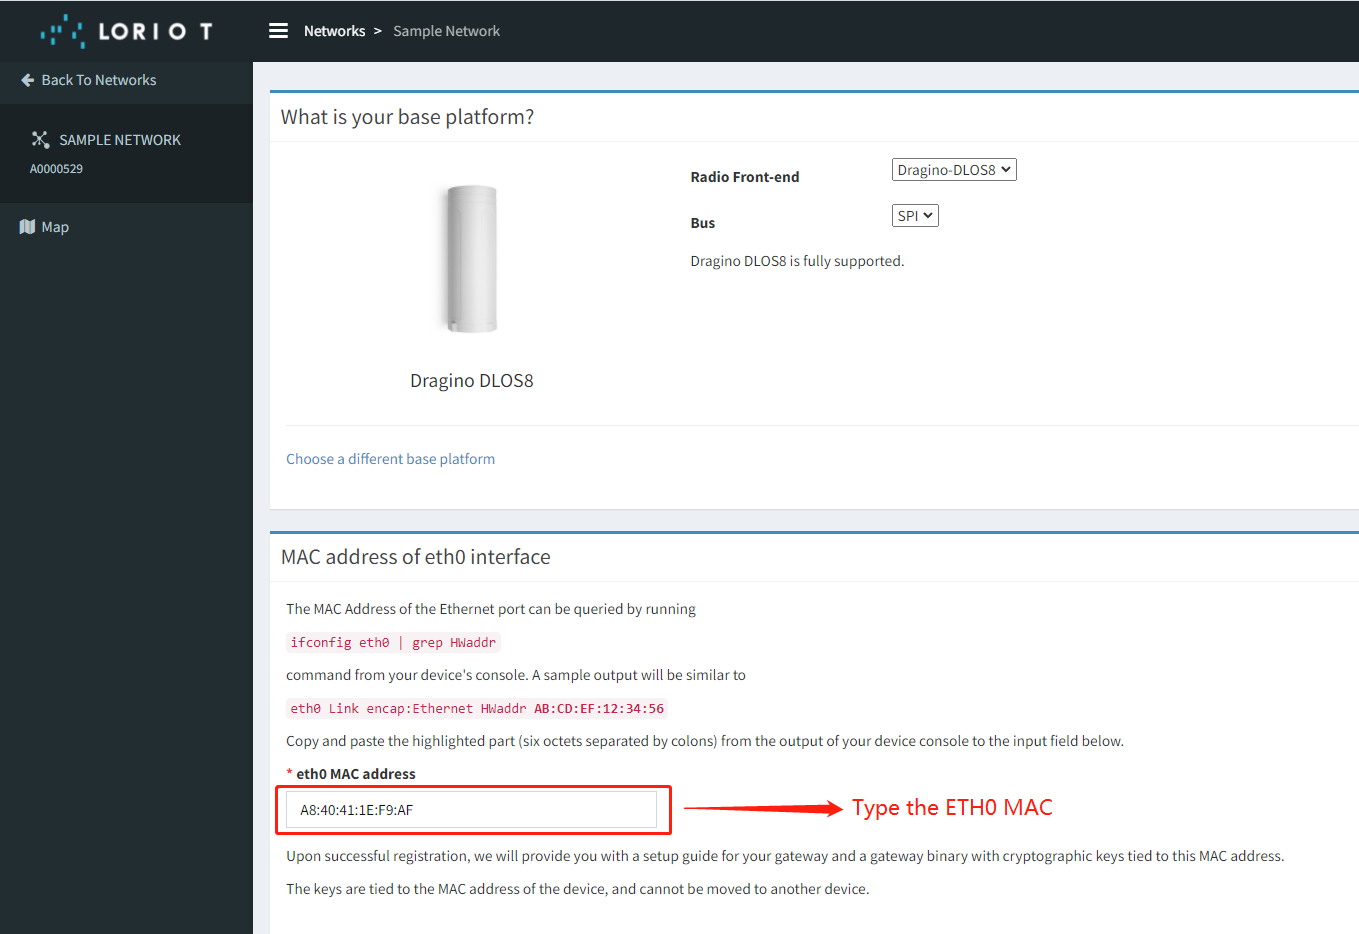
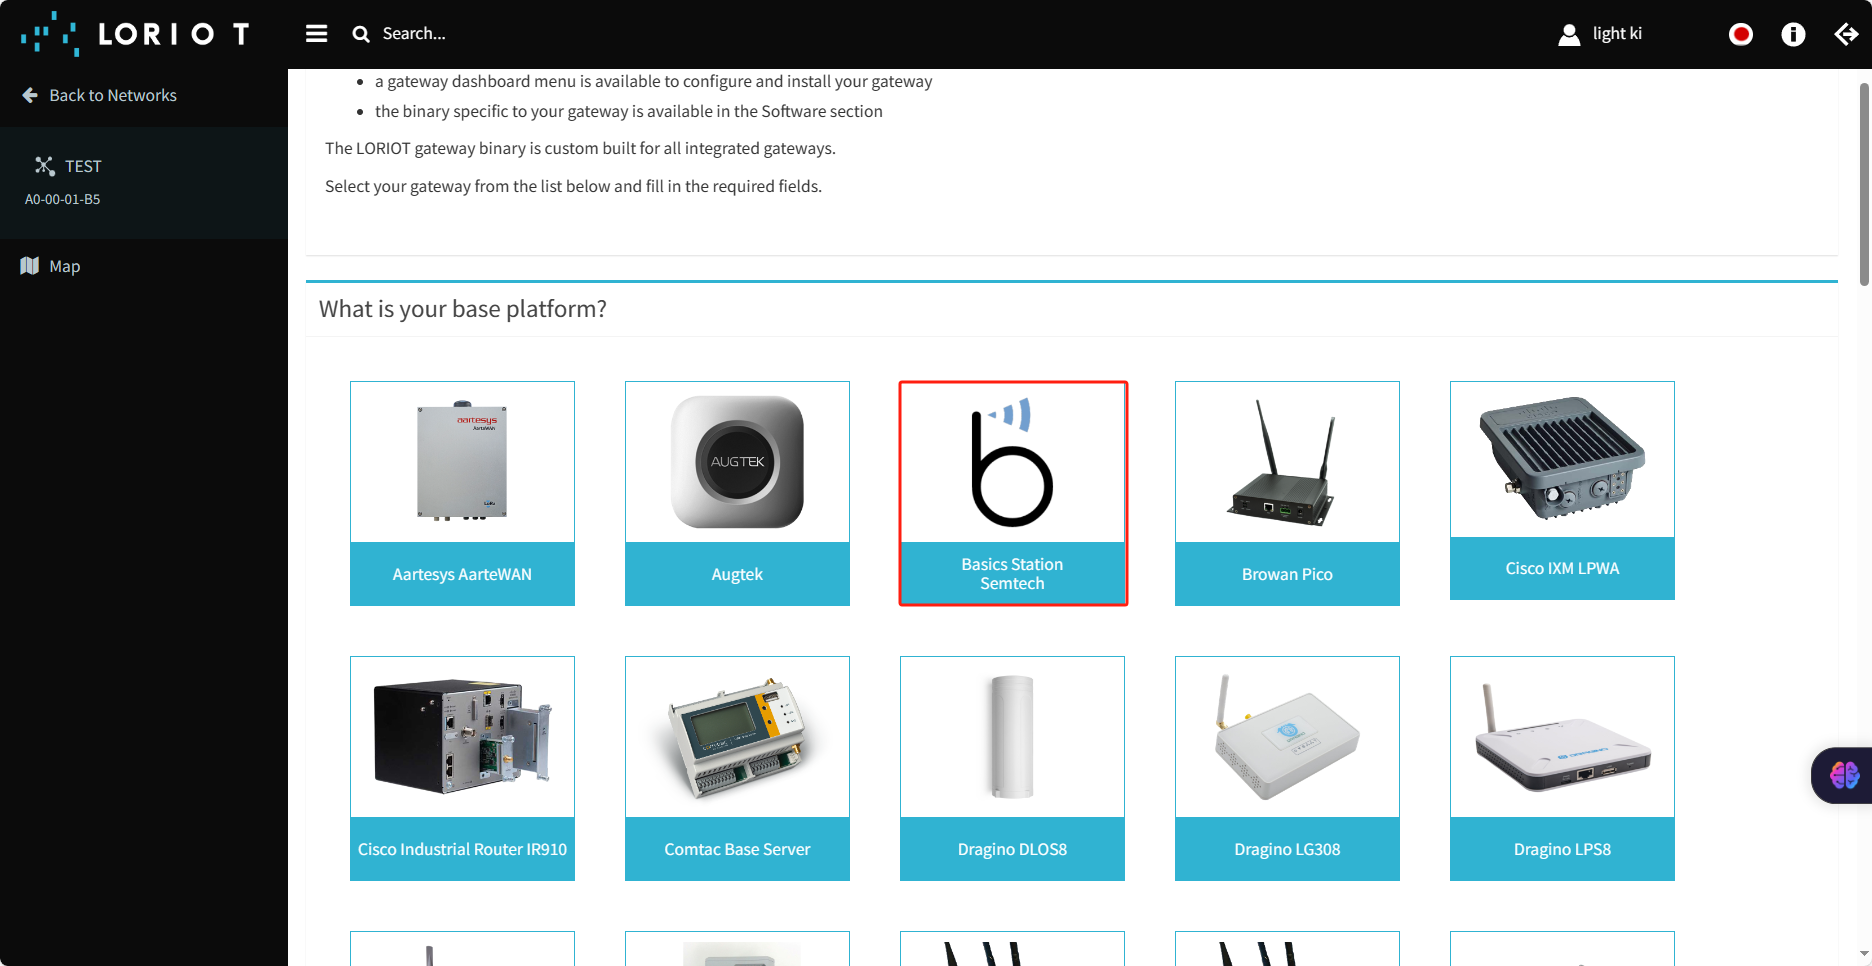
Choose gateway model
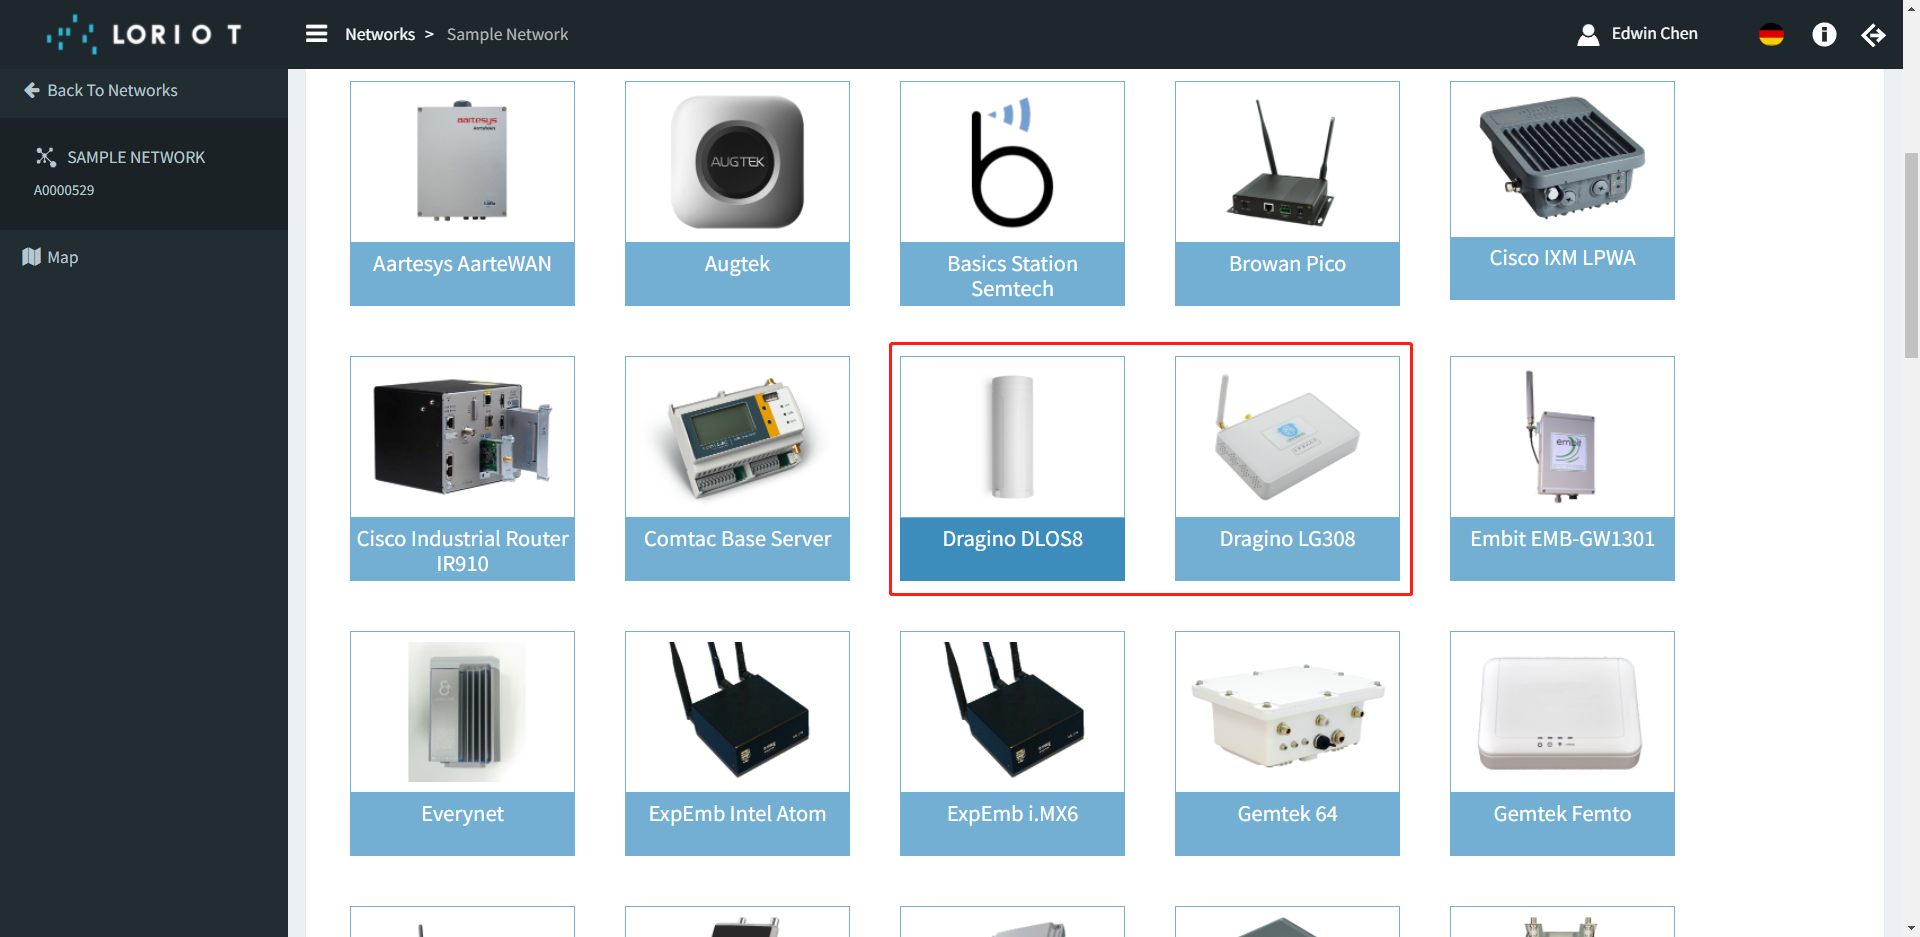
Special reminder: If the user does not find the gateway Model, then git --> Packet Forwarder Semtech can be selected
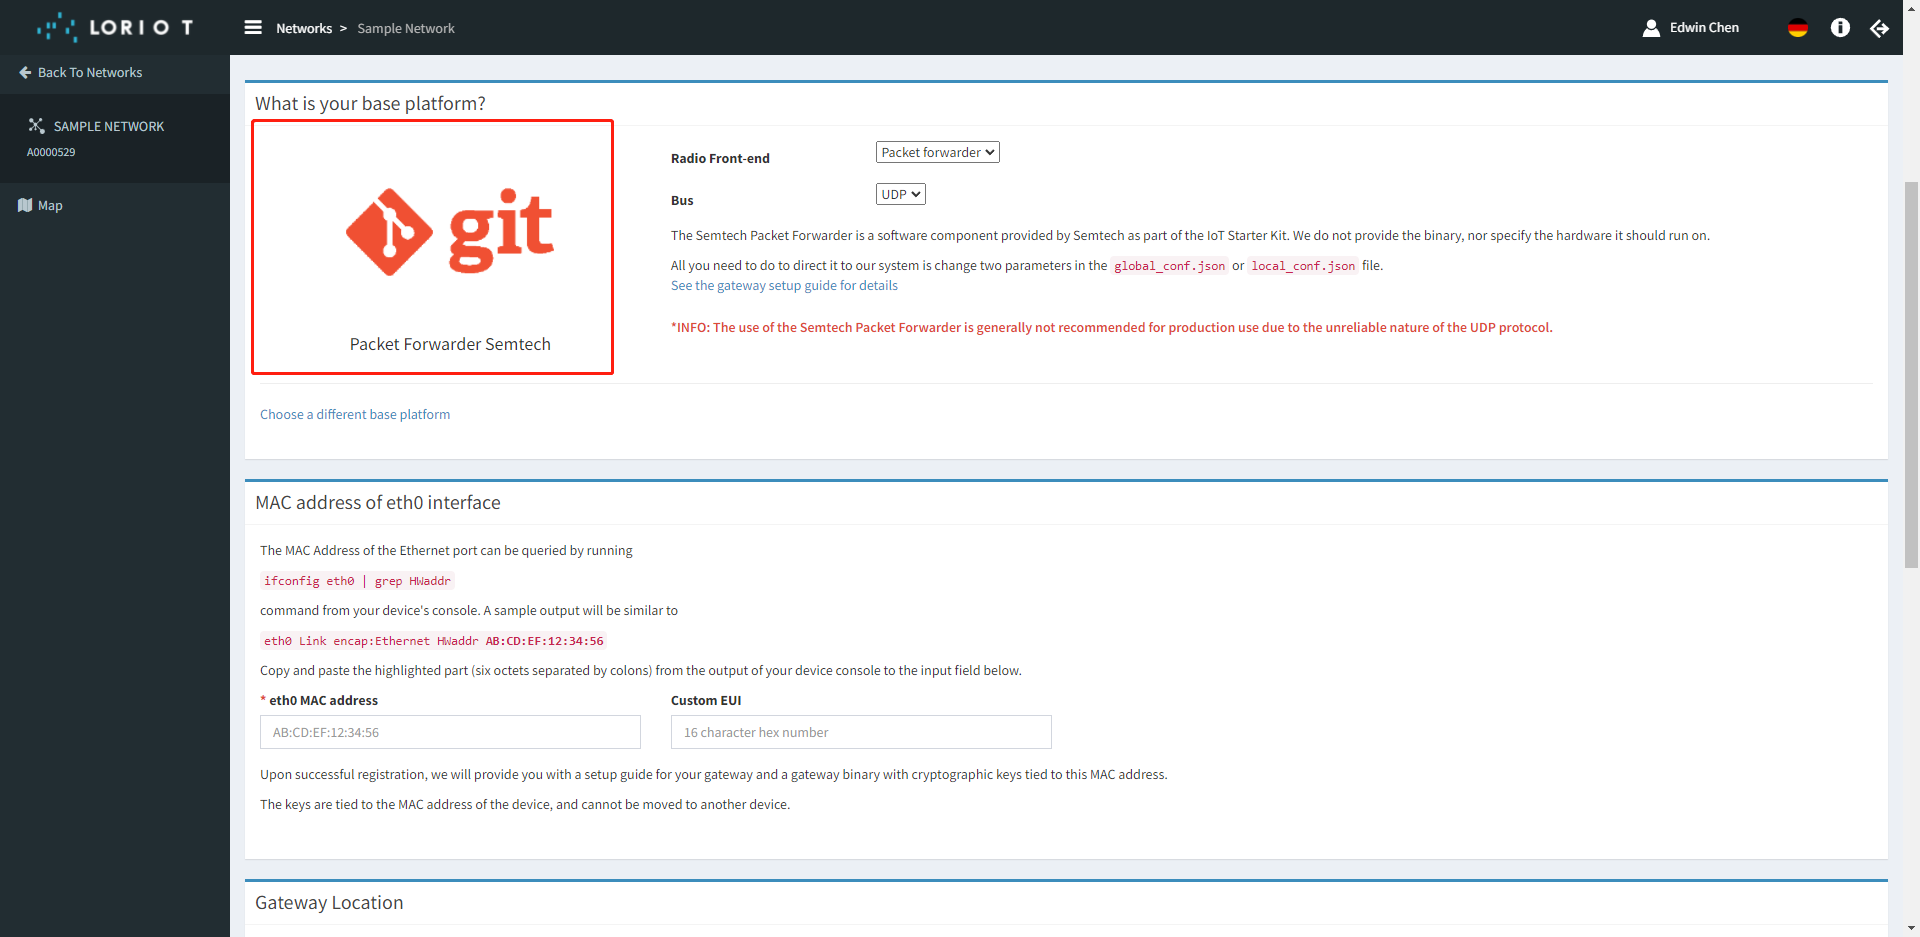
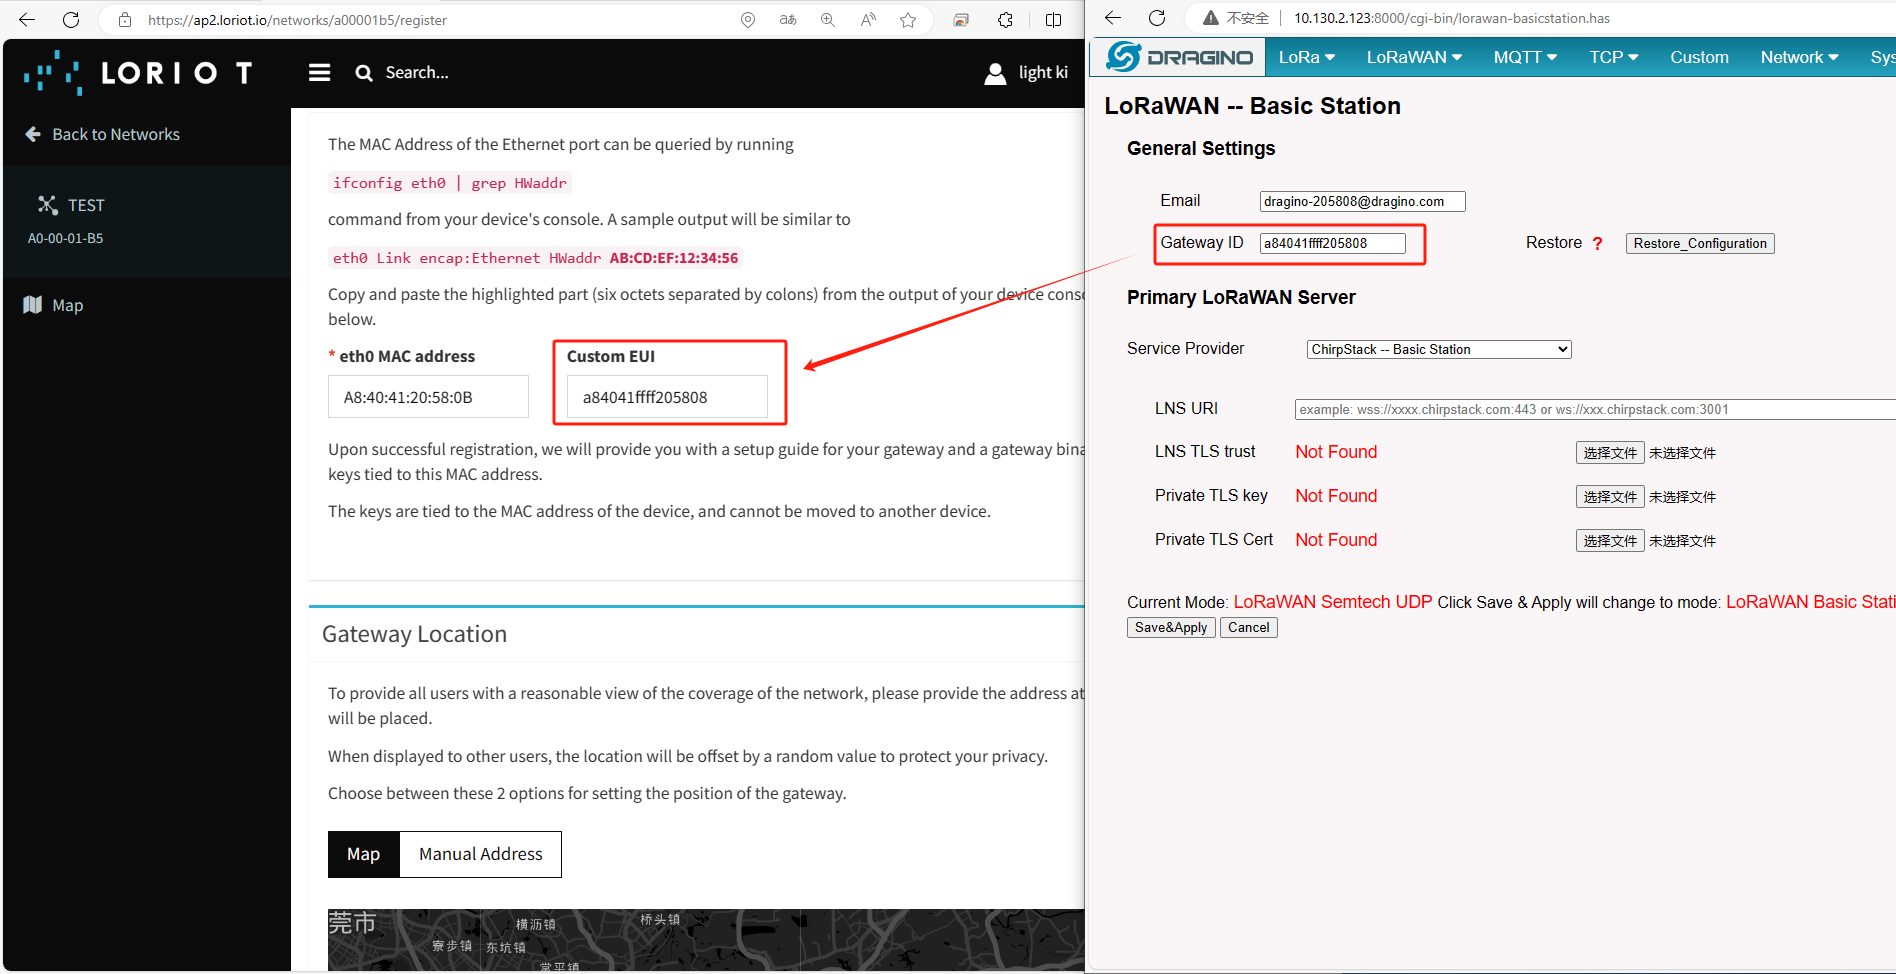
Enter the ETH0 MAC of the gateway
2.3 Step 3: Back to Semtech UDP page
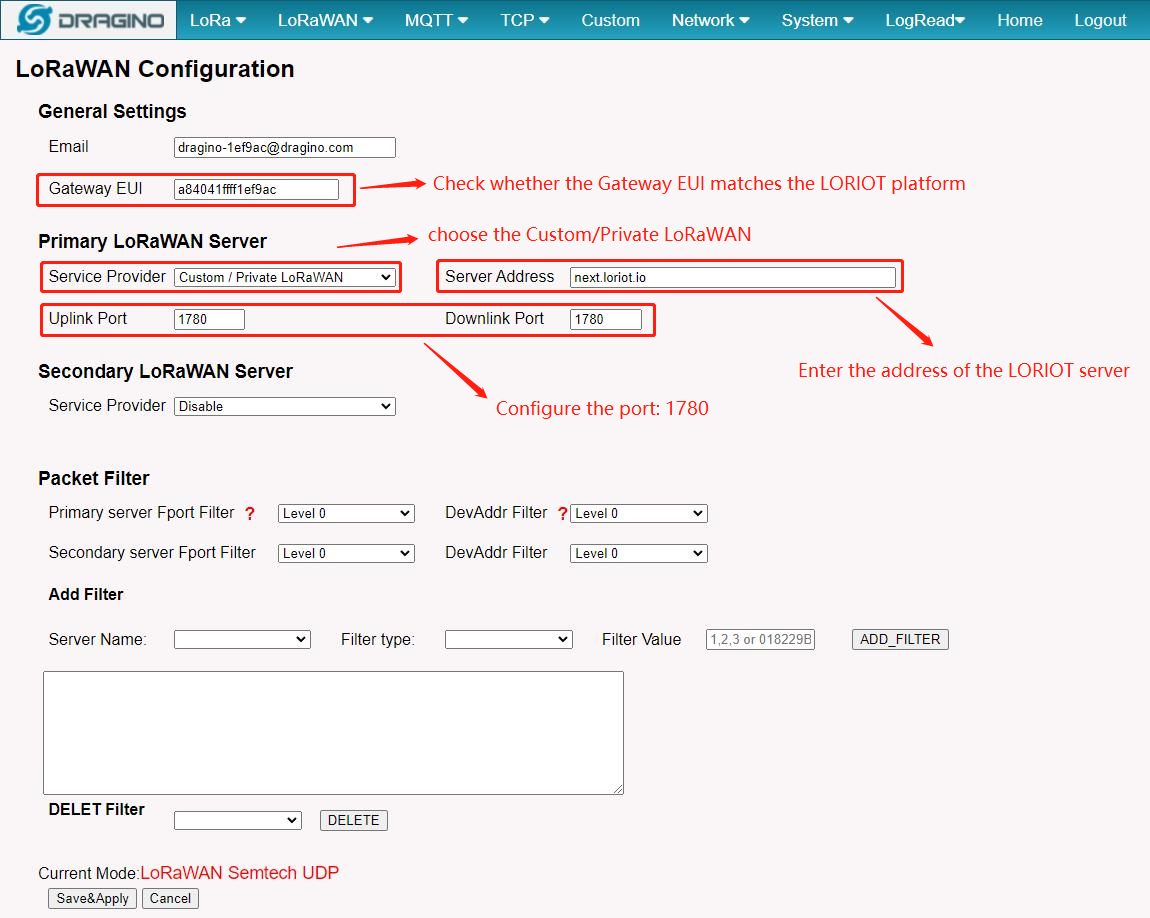
Back to the page of Semtech UDP check the secondary server settings and click the button of Save&Apply.
- Server Address: --> LORIOT Different servers use different addresses, Such as: next.loriot.io
- Uplink /Downlink Port : --> 1780
2.4 Step 4: Check Connection
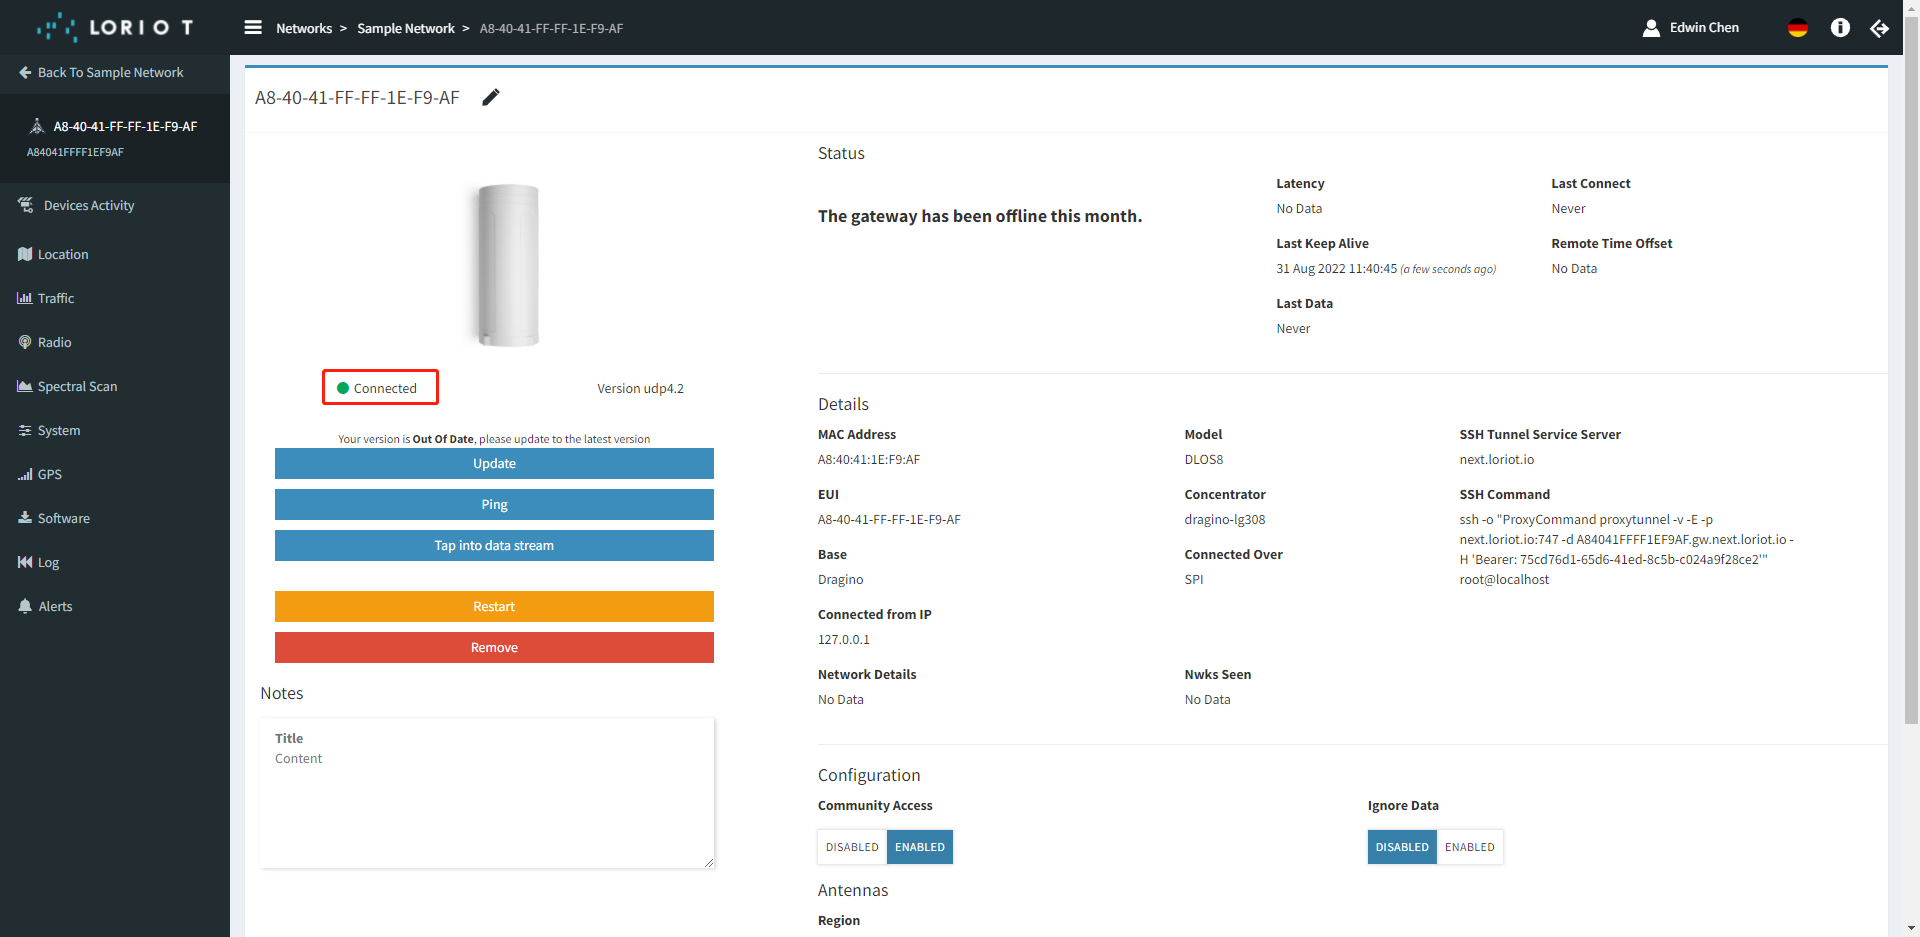
LORIOT will show disconnect if Gateway doesn't connect
LORIOT will show connect if Gateway connect to LORIOT ok.
2.5 Trouble Shooting
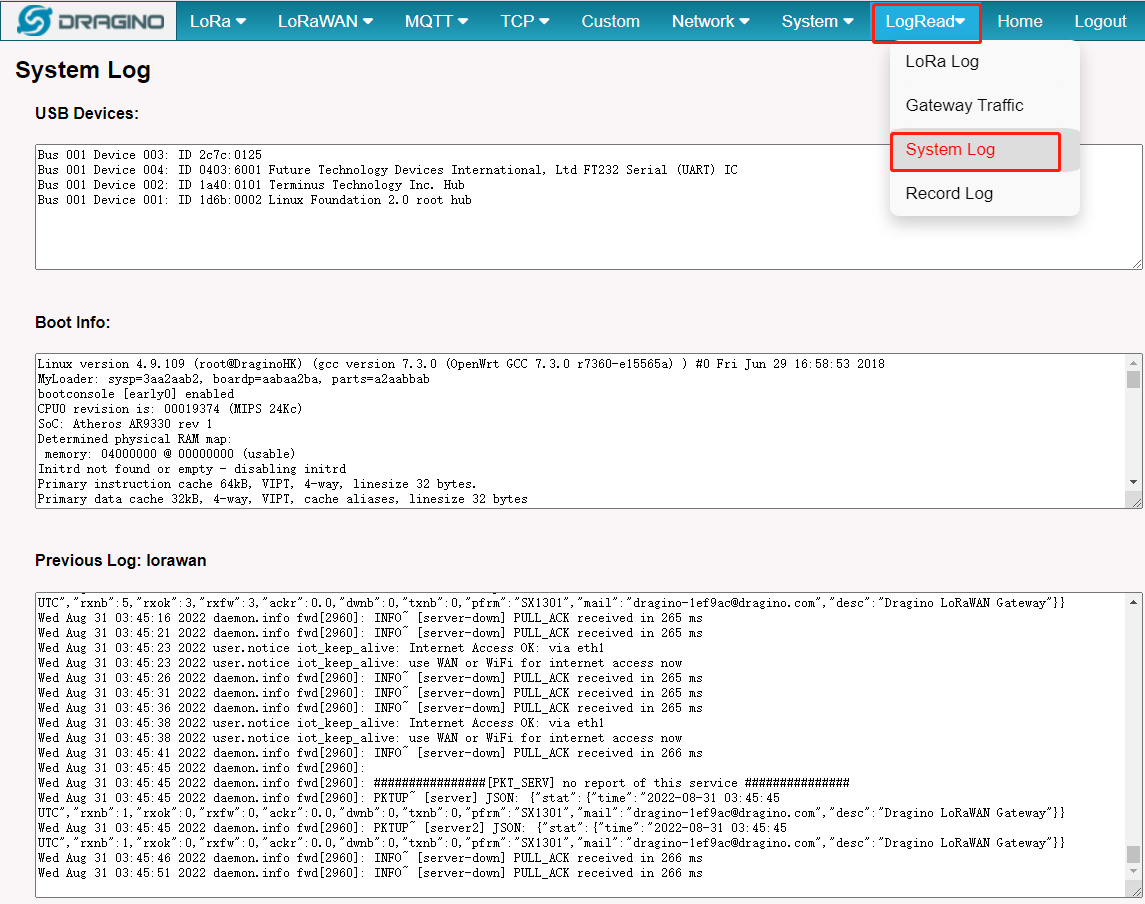
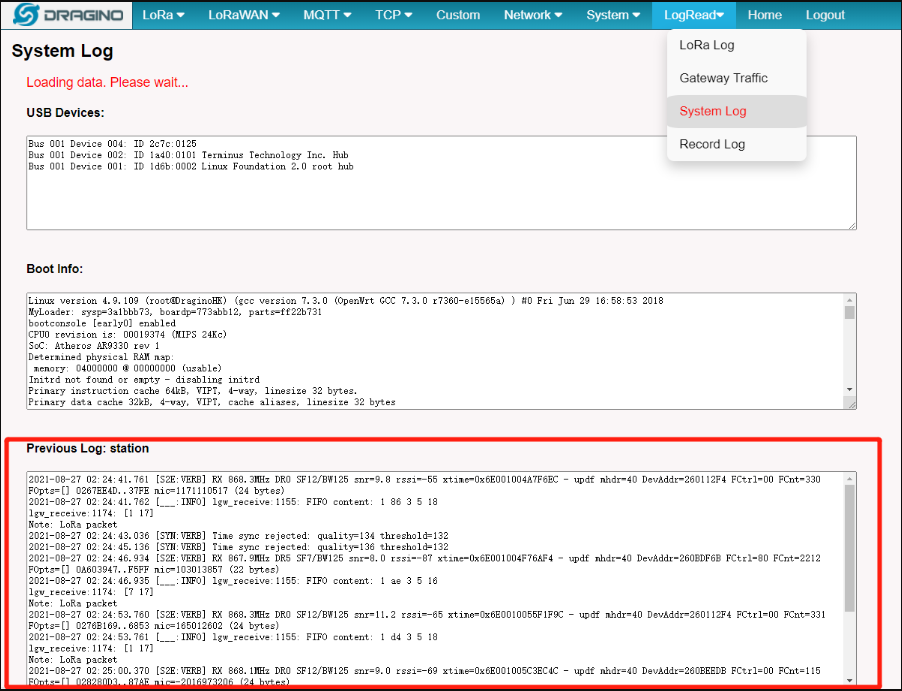
User can check the station log in the LogRead --> System Log page.
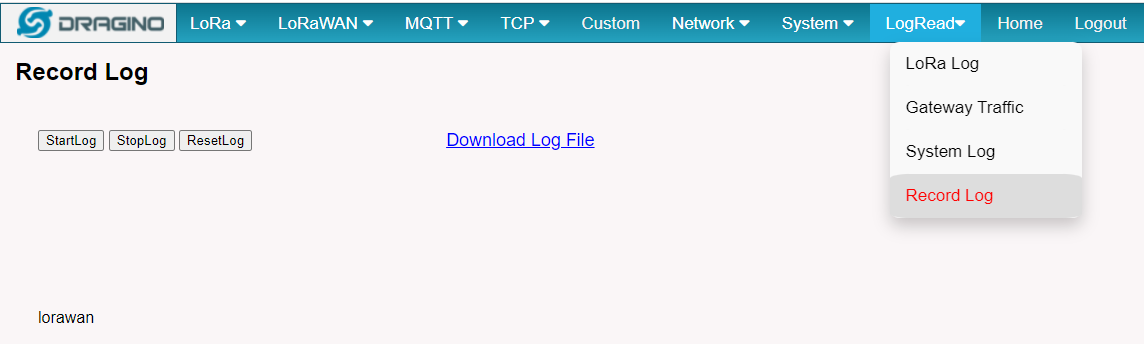
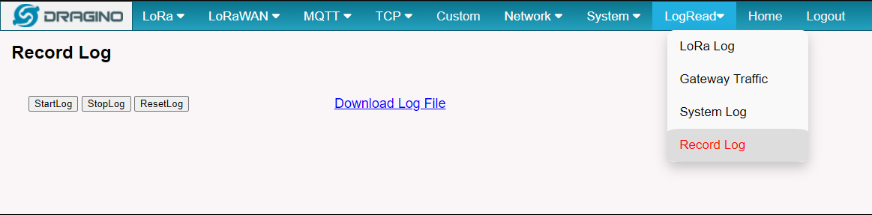
and recode the station log in the LogRead --> Recode Log page.
3. Gateway Registration for Basics Station
The LoRa Basics™ Station protocol simplifies the management of large-scale LoRaWAN networks. LoRa Basics™ Station is the preferred way of connecting Gateways to LORIOT. The LoRa Basics Station doc
Below list the support products and Requirements:
- LoRaWAN Gateway model: LIG16, LG308, DLOS8, LPS8, LPS8N, LG308N
- Firmware version since : lgw--build-v5.4.1704801796-20240109-2005
What do you need to prepare?
A gateway that can access the internet normally
3.1 Step 1: Register Gateway
Enter the gateway ID into the Custom EUI
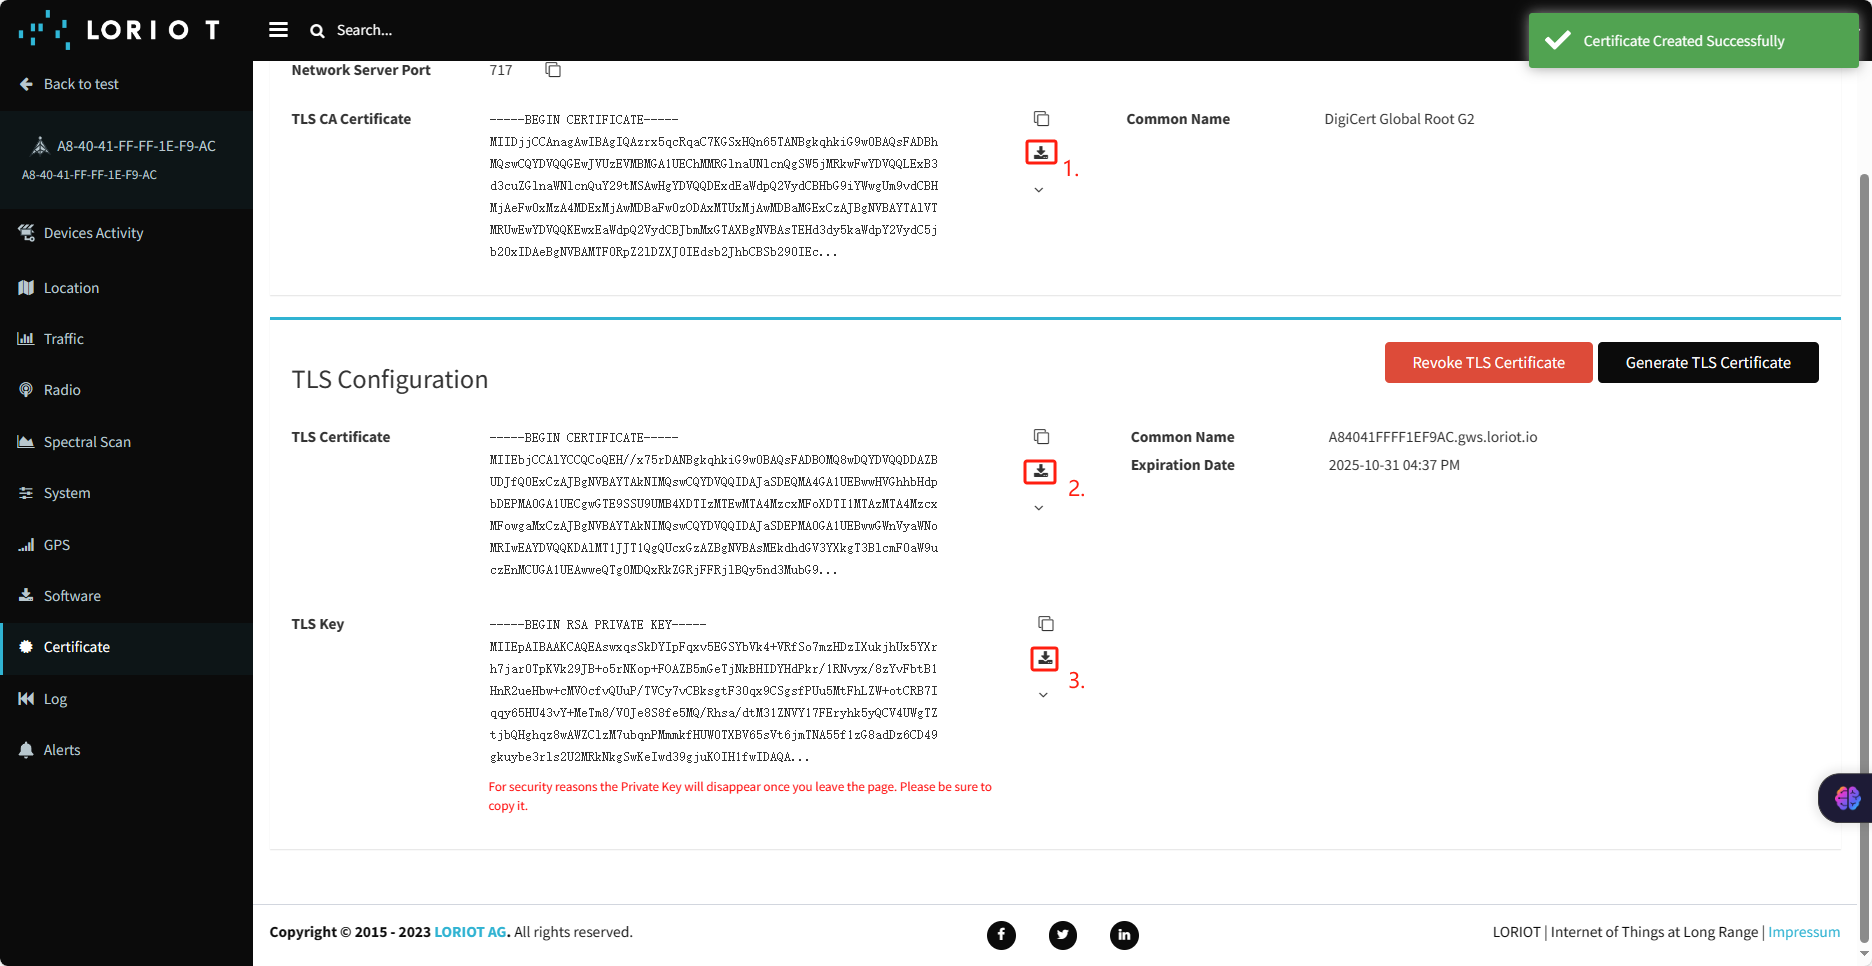
3.2 Step 2: Generate and Download TLS Certificate
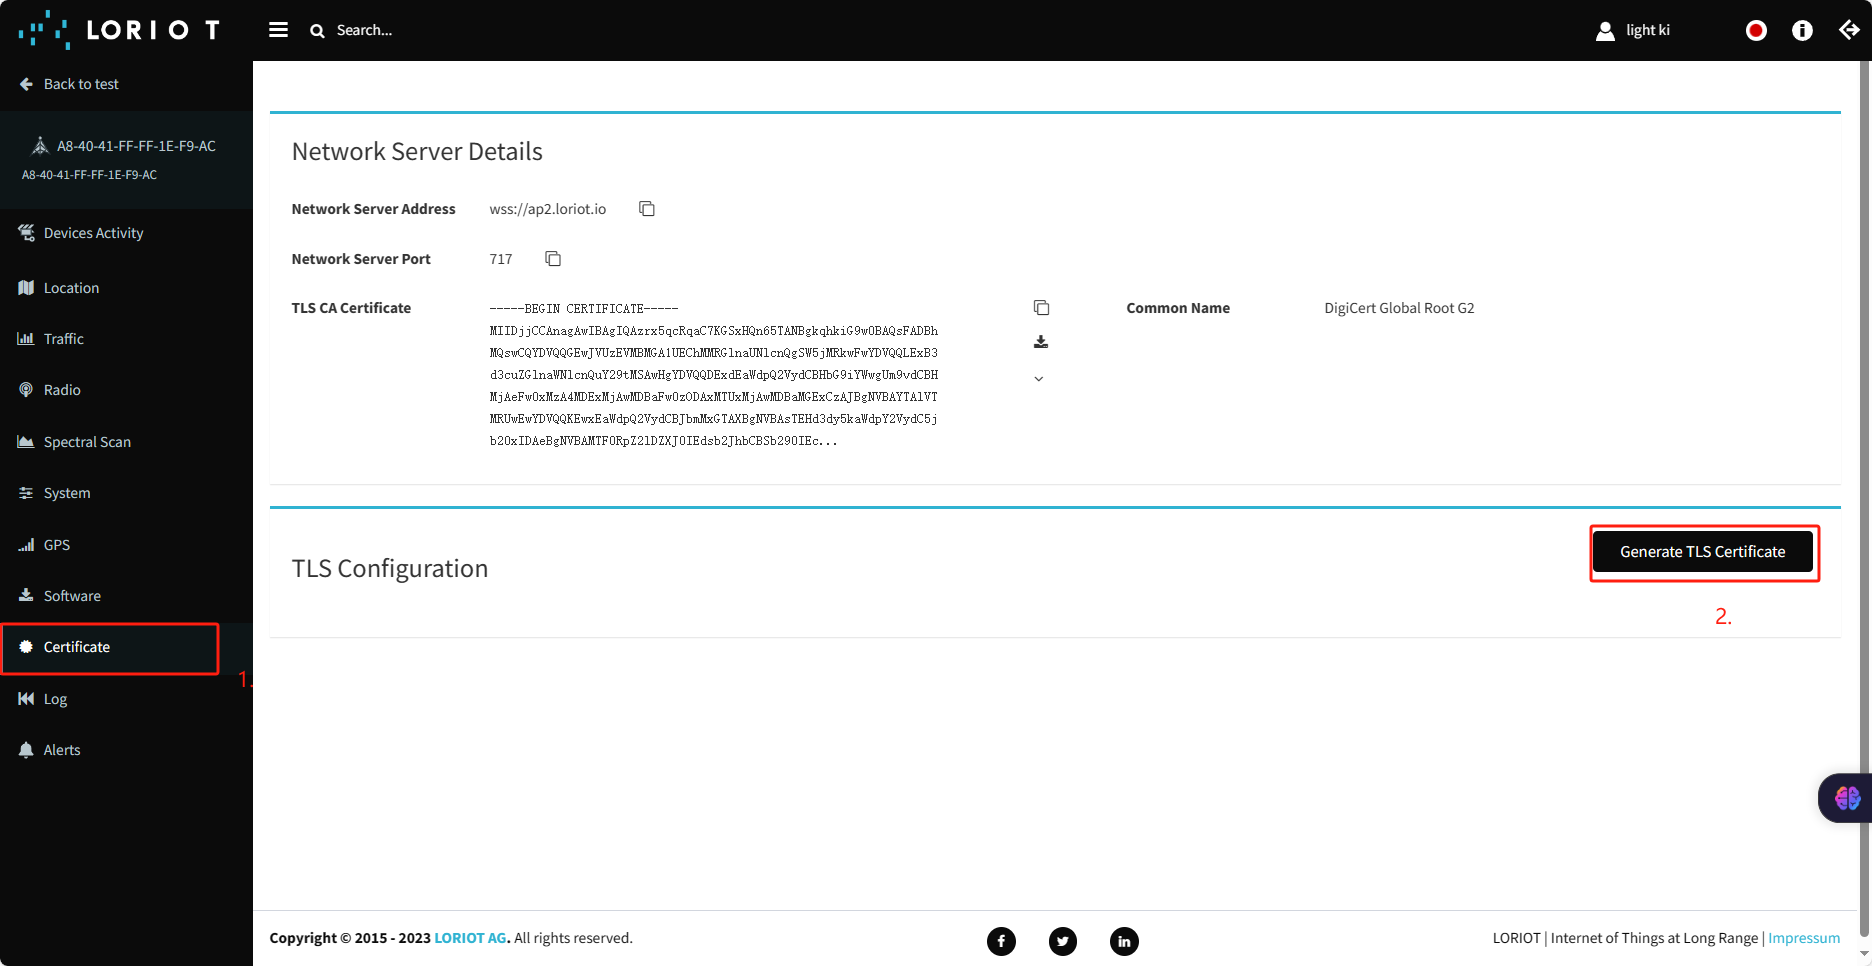
Download LORIOT's three TLS certificates, which are:
DigiCert_Global_Root_G2.crt , "Gateway EUI".gws.loriot.io.crt , "Gateway EUI".gws.loriot.io.key
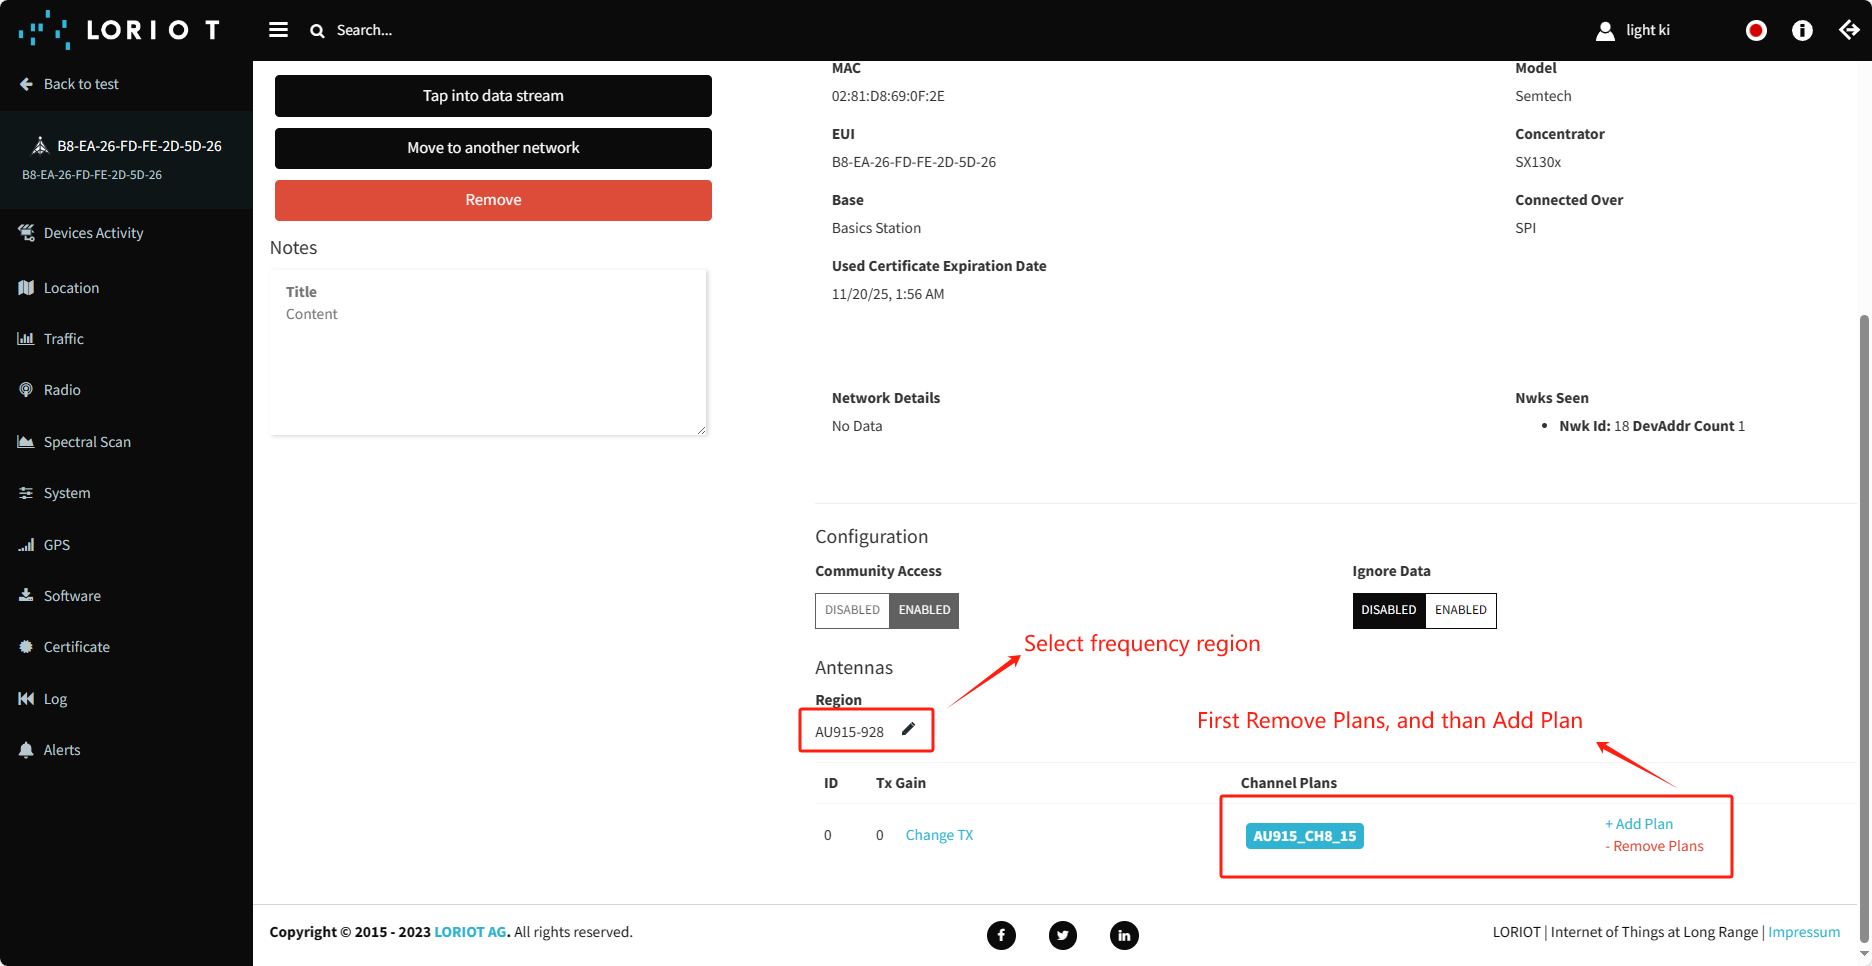
3.3 Step 3: Configure frequency
Note: The Dragino gateway supports only one Channel plan
3.4 Step 4: Access the gateway GUI
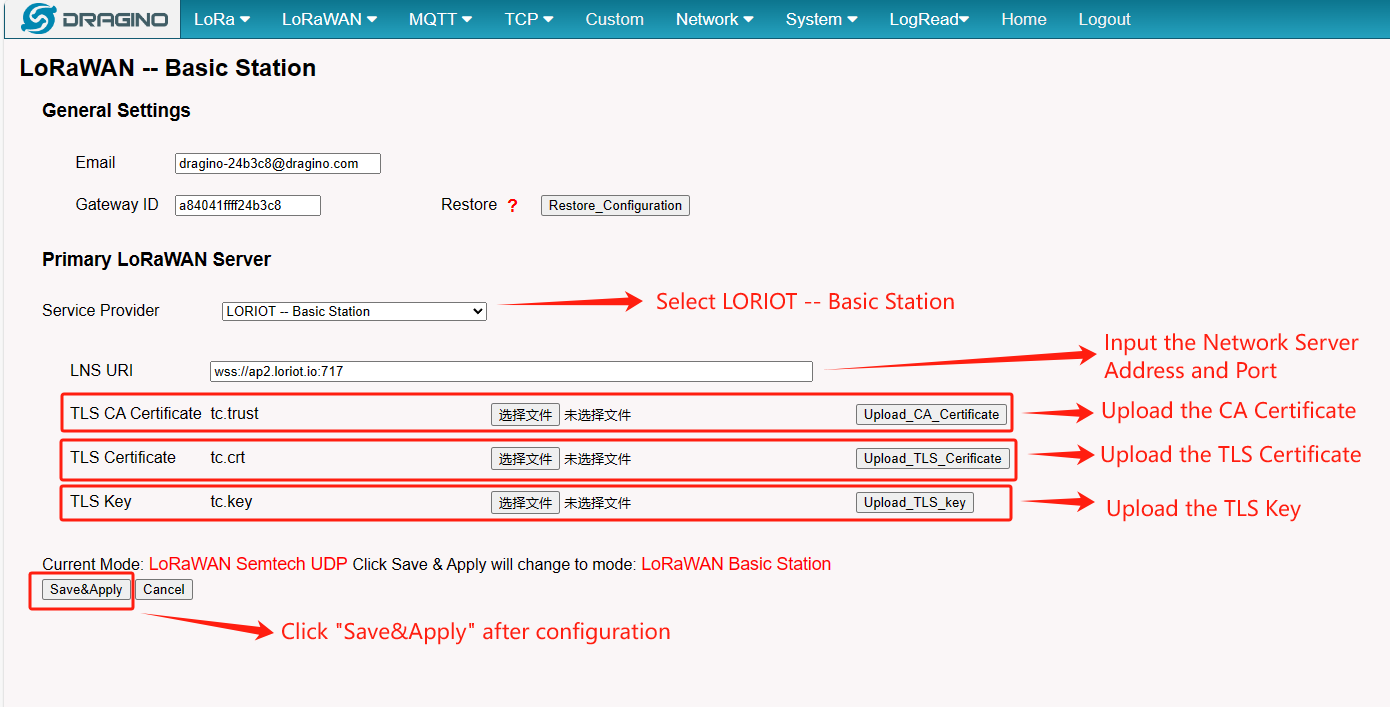
User need to upload the TLS CA Certificate,TLS Key,TLS Certificate and configure the LNS URI
3.5 Step 5: Configure Station
User need to input Server URI, Server CUPS Key and LNS Key, as well as install CUPS certificate.
just to clarify:
- Server URI --> Server Address, Example: wss://ap2.loriot.io:717
- TLS CA Certificate --> DigiCert_Global_Root_G2.crt
- TLS Key --> "Gateway EUI".gws.loriot.io.key
- TLS Certificate --> "Gateway EUI".gws.loriot.io.crt
3.6 Start Station
When the user has finished the configuration, Please click "Save&Apply" to start station to connect LORIOT.
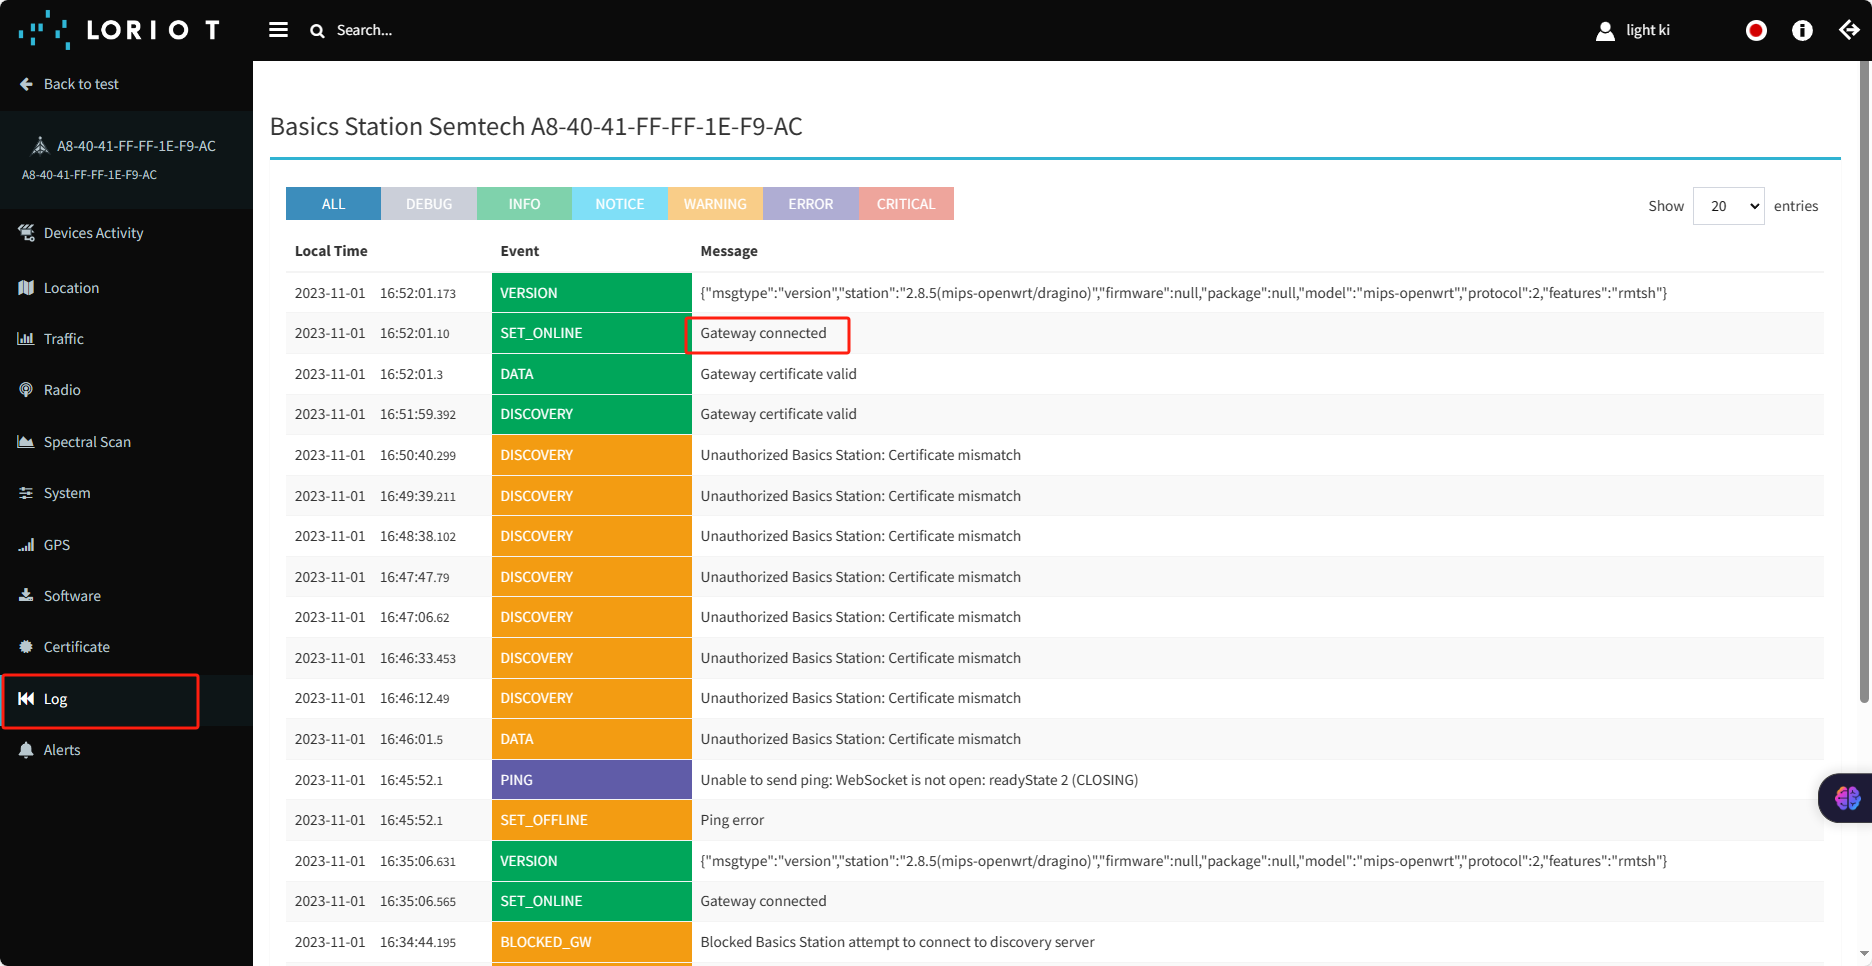
3.7 Check Connection
If user completes the above steps,which will see Log in the LORIOT.
3.8 Trouble Shooting
User can check the station log in the LogRead --> System Log page.
and recode the station log in the LogRead --> Recode Log page.
4. End Device Note
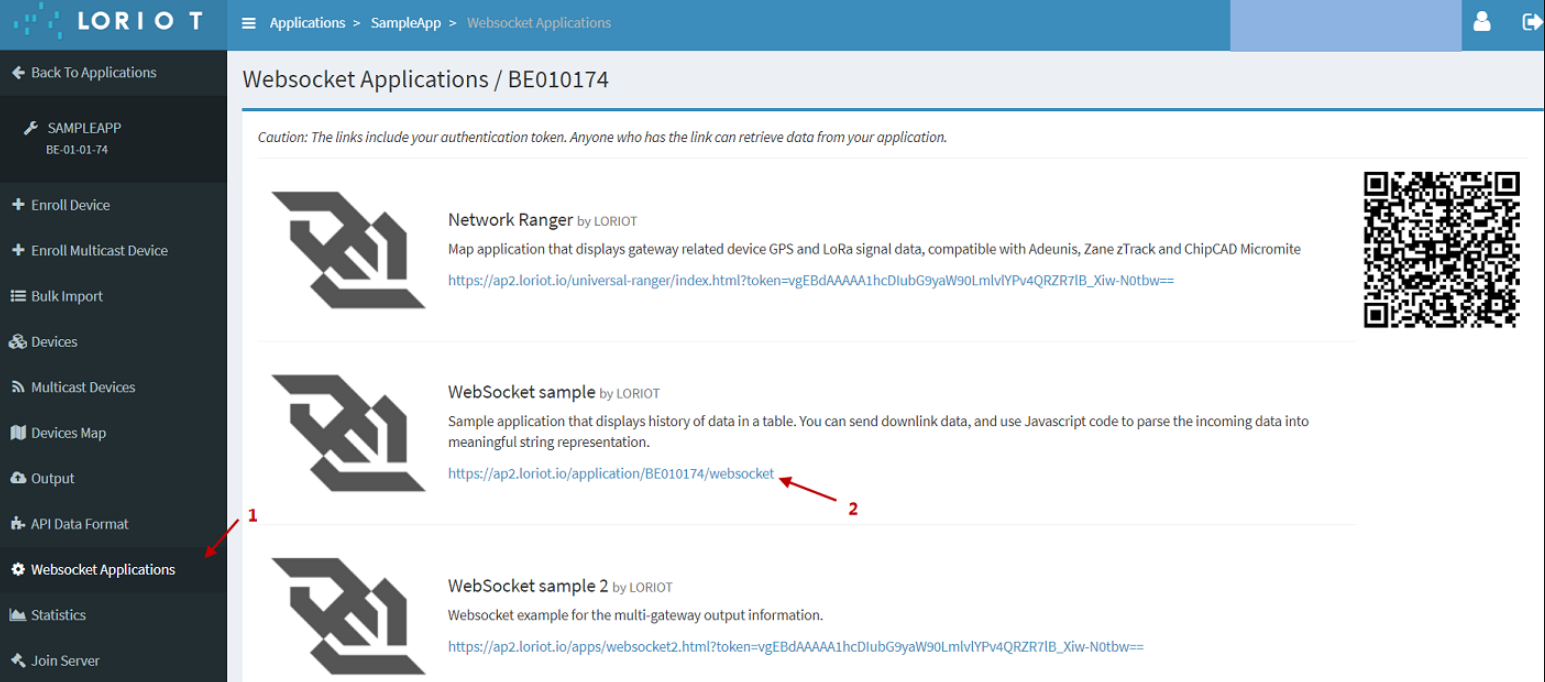
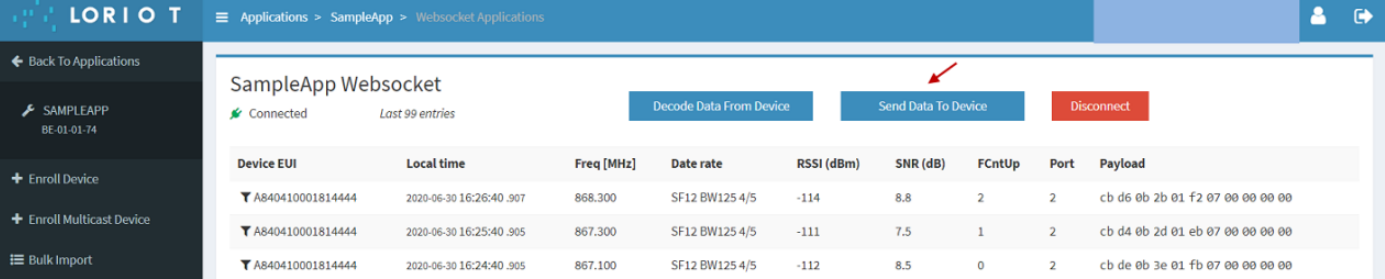
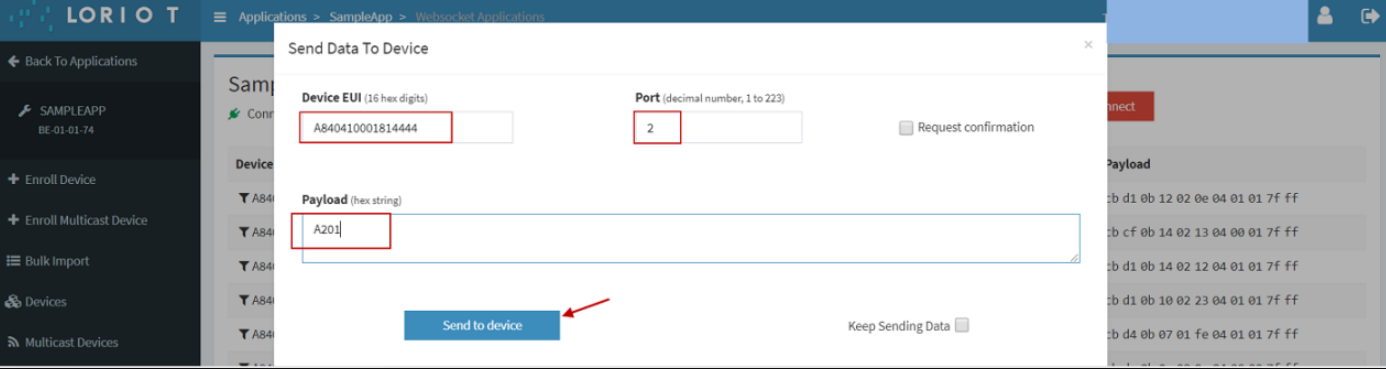
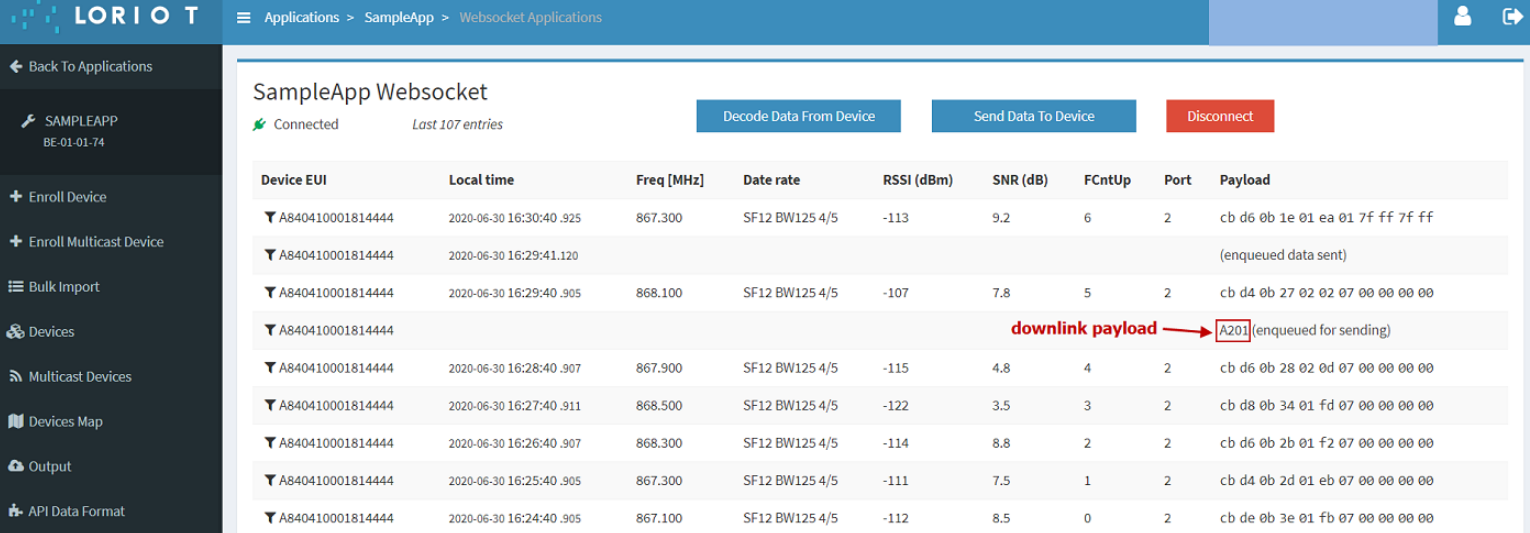
4.1 Downlink Setup